Zhylar Partner Guide: Managing Subscriptions & Billing

This guide is designed to help Zhylar partners understand how subscription management works within the platform. Your role as a business partner is critical to helping customers through the onboarding process, assigning a subscription plan, managing their subscriptions, and assisting them with any billing-related activities for end users. 

Unlike self-service platforms where users directly purchase subscriptions, Zhylar follows a partner-driven subscription model. In this model, the Zhylar partner is responsible for assigning paid subscriptions to customers and providing any support needed through the duration of the subscription, such as assisting with upgrades, managing renewal activity, and providing customer support during the life cycle of the subscription. 

This article covers everything partners need to know, including: 

  • Assigning subscriptions to existing users  
  • Onboarding and assigning plans to new users  
  • Understanding how self-sign-up organizations work  
  • Managing freemium and paid subscriptions  
  • Accessing invoices and billing information  
  • Making subscription payments  

Use this guide as a reference for managing customer subscriptions efficiently within Zhylar. 

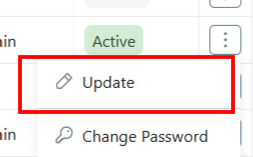
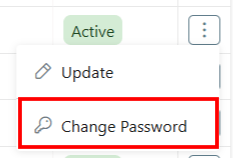
How to Assign a Subscription to Existing Users

Partners can assign a subscription plan to users who already have an existing Zhylar account. 

Steps to Assign a Subscription 

  1. Log in to the partner portal.  
  2. Navigate to the customer or organization management section.  
  3. Search for the existing organization.  
  4. Click on “Change Subscription” or “Renew Subscription” for an Organisation with an active plan, or 
  5. Click on “Add Plan” in case no plan is assigned to the organisation previously. 
  6. Select the required subscription plan. 
  7. Checkout & Pay for the subscription. If the payment goes through successfully, the system will assign the plan to the organization.  

Please Note: 

  • The subscription start date will be set to payment date & it cannot be modified by Partner. 
  • Once assigned, the user will immediately receive access to the features and limits available in the selected plan.

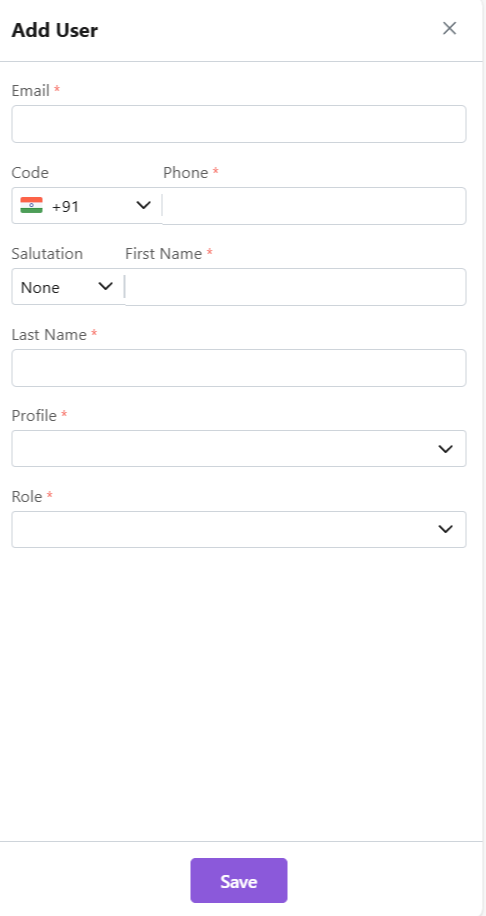
How to Assign a Subscription to New Users

Partners can also onboard completely new users and assign subscriptions during the onboarding process. 

Steps to Assign a Subscription to New Users 

  1. Log in to the partner portal.  
  2. Create a new customer or organization.  
  3. Enter the required user and organization details.  
  4. Select the subscription plan to be assigned.  
  5. Checkout & Pay for the Subscription bought. If the payment goes through successfully, the system will assign the plan to the organization. 
  6. Complete the onboarding process.  

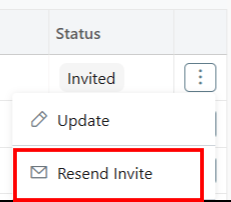
After onboarding is completed: 

  • Partner will have to “Sent Invite” to the organization admin 
  • The user will receive an activation email.  
  • The assigned subscription will already be active on the account.  
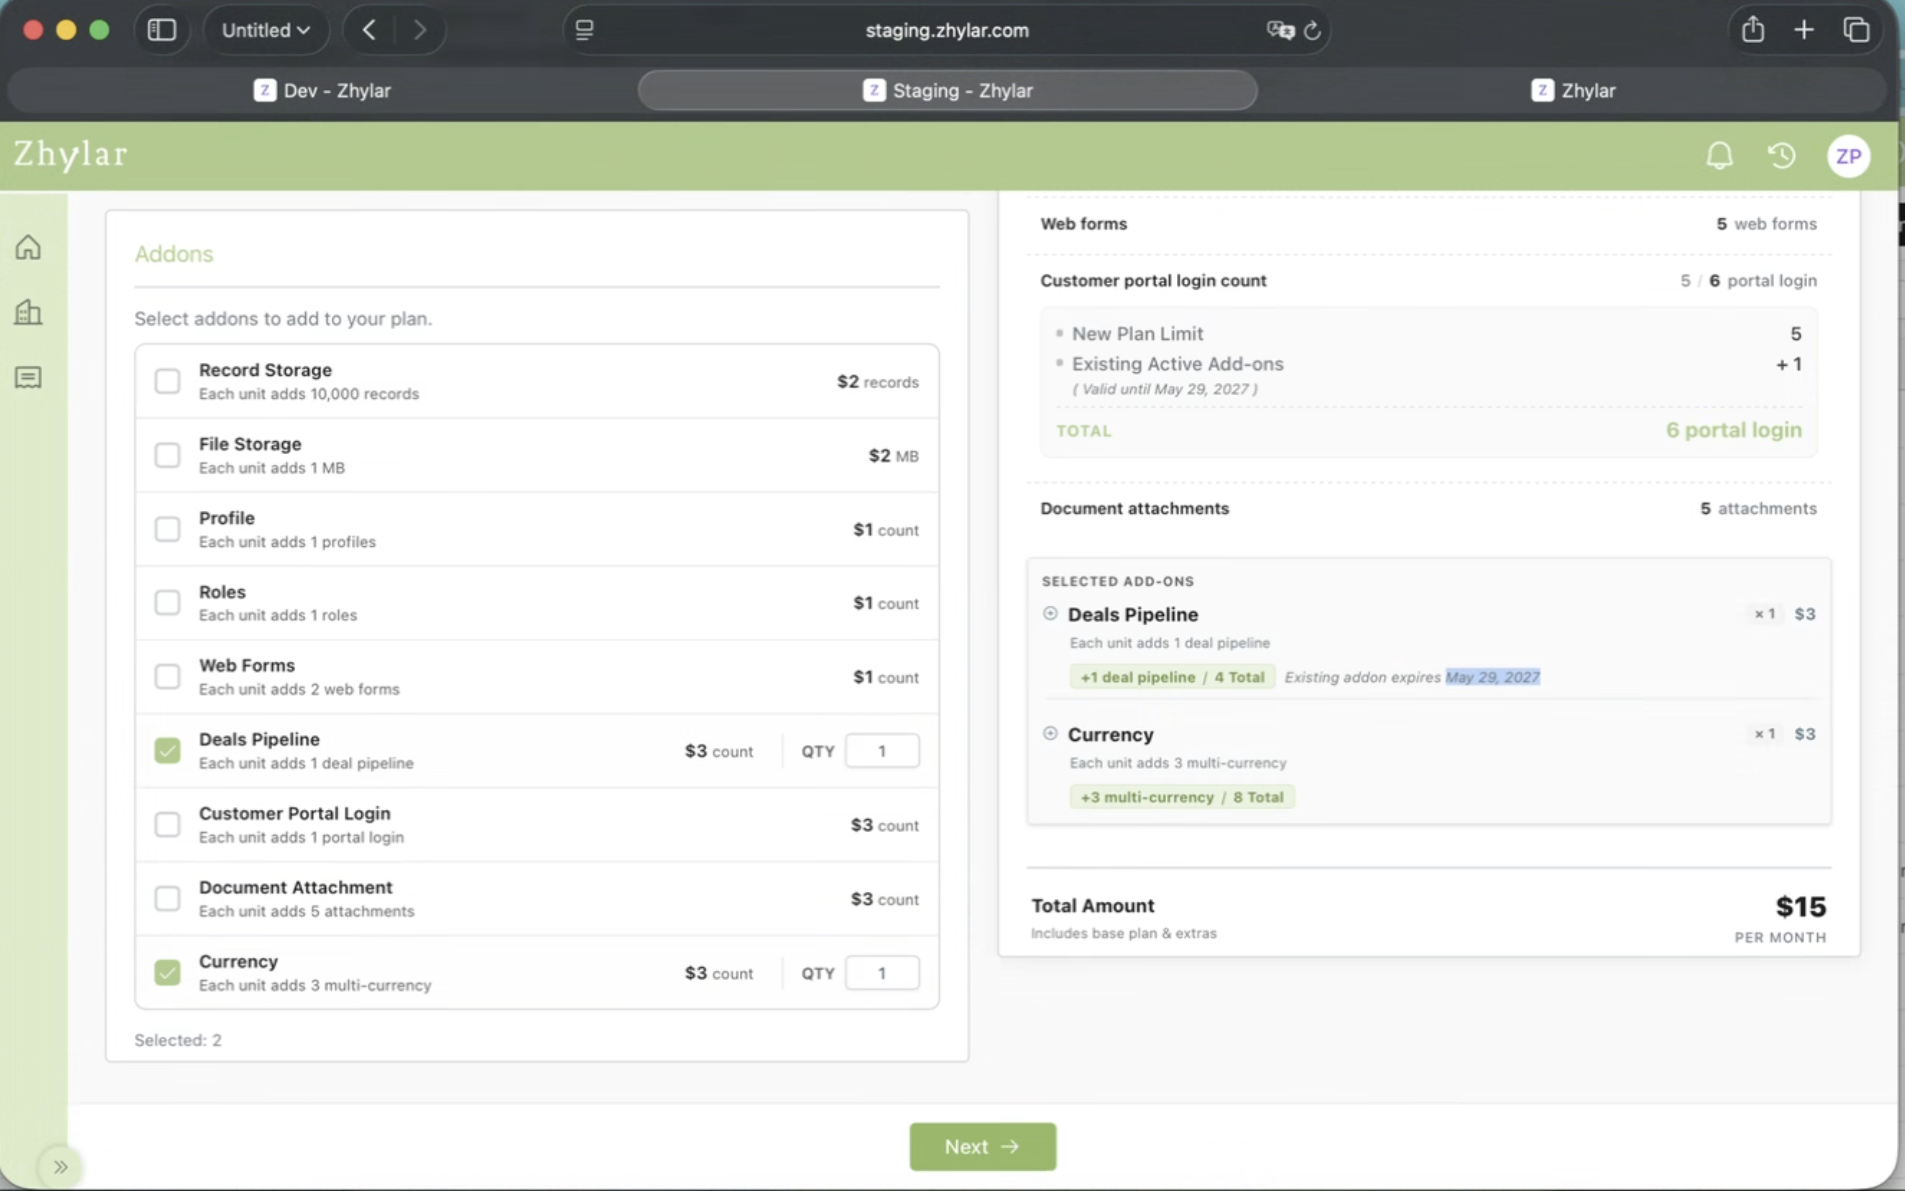
 Add-Ons Management 

Add-Ons provide organizations with additional capabilities, limits, or functionality without requiring them to upgrade their entire subscription plan. Partners can assign Add-Ons to organizations in two ways. 

Method 1: Adding Add-Ons During Onboarding 

When onboarding a new organization, partners can assign Add-Ons as part of the subscription setup process. 

Steps 

  1. Create or onboard the new organization.  
  2. Select the subscription plan to be assigned.  
  3. Review the available Add-Ons.  
  4. Select the required Add-On(s) based on the customer’s requirements.  
  5. Complete the onboarding process.  
  6. The selected Add-On(s) will be activated along with the subscription plan.  

This allows organizations to start using the platform with all the features and limits they require from day one. 

Method 2: Adding Add-Ons to an Existing Subscription 

Partners can also add Add-Ons after a subscription has already been assigned to an organization. 

This typically happens when an organization requires additional functionality, capacity, or resources after onboarding. 

Steps 

  1. Open the organization’s subscription details.  
  2. Verify that the organization has an active paid subscription.  
  3. Review the customer’s additional requirements.  
  4. Select the required Add-On(s).  
  5. Confirm the Add-On assignment.  
  6. The Add-On will be activated immediately, and billing will be adjusted accordingly.  

Important Eligibility Requirement 

Before assigning an Add-On, partners must ensure that: 

  • The organization has an active paid subscription plan.  
  • Add-Ons cannot be assigned to organizations using the Freemium Plan. 
  • Add-Ons can only be purchased and activated on top of an active paid subscription. 

Add-On Pricing & Billing 

Fixed Add-On Pricing 

Each Add-On has a predefined fixed price. However, the amount charged depends on the remaining duration of the organization’s current billing cycle. 
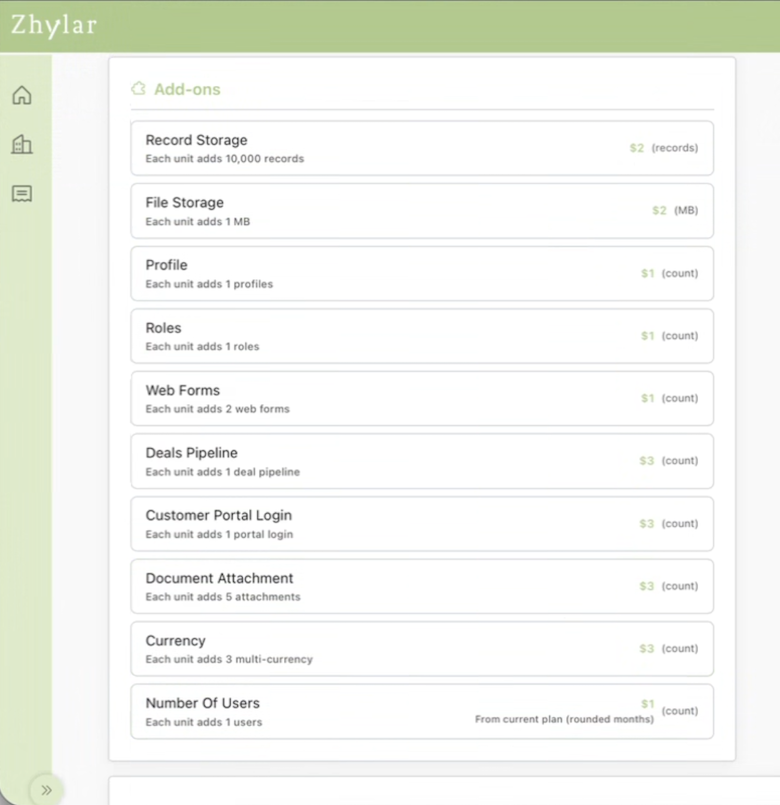
Pro-Rata Billing 

Add-Ons are billed on a pro-rata basis based on the remaining period of the active subscription. 

Example – Yearly Subscription 

  • Organization purchases a yearly subscription.  
  • Six months later, they request an Add-On.  
  • The Add-On will only be charged for the remaining six months of the billing cycle.  
  • The organization will not be charged for the full year.  

Example – Monthly Subscription 

  • Organization purchases a monthly subscription.  
  • Midway through the month, they request an Add-On.  
  • Charges will be calculated based on the remaining duration of the billing cycle.  

Minimum Billing Rule 

If an Add-On is purchased very close to the subscription renewal date, the minimum billing period will still apply. 

Example 

If an organization purchases an Add-On with only one day remaining before subscription expiry, the organization will still be charged for one full month for that Add-On. 

This ensures that Add-On billing remains aligned with the applicable subscription billing cycle. 

What Happens to Self-Signed-Up End Users

Some users may create accounts directly through the free sign-up option available on the Zhylar login page. 

These users: 

  • Are automatically onboarded into a free plan (yearly) organization.  
  • Can use Zhylar with freemium-level access.  
  • Cannot directly purchase a paid plan on their own.  

If they want to upgrade: 

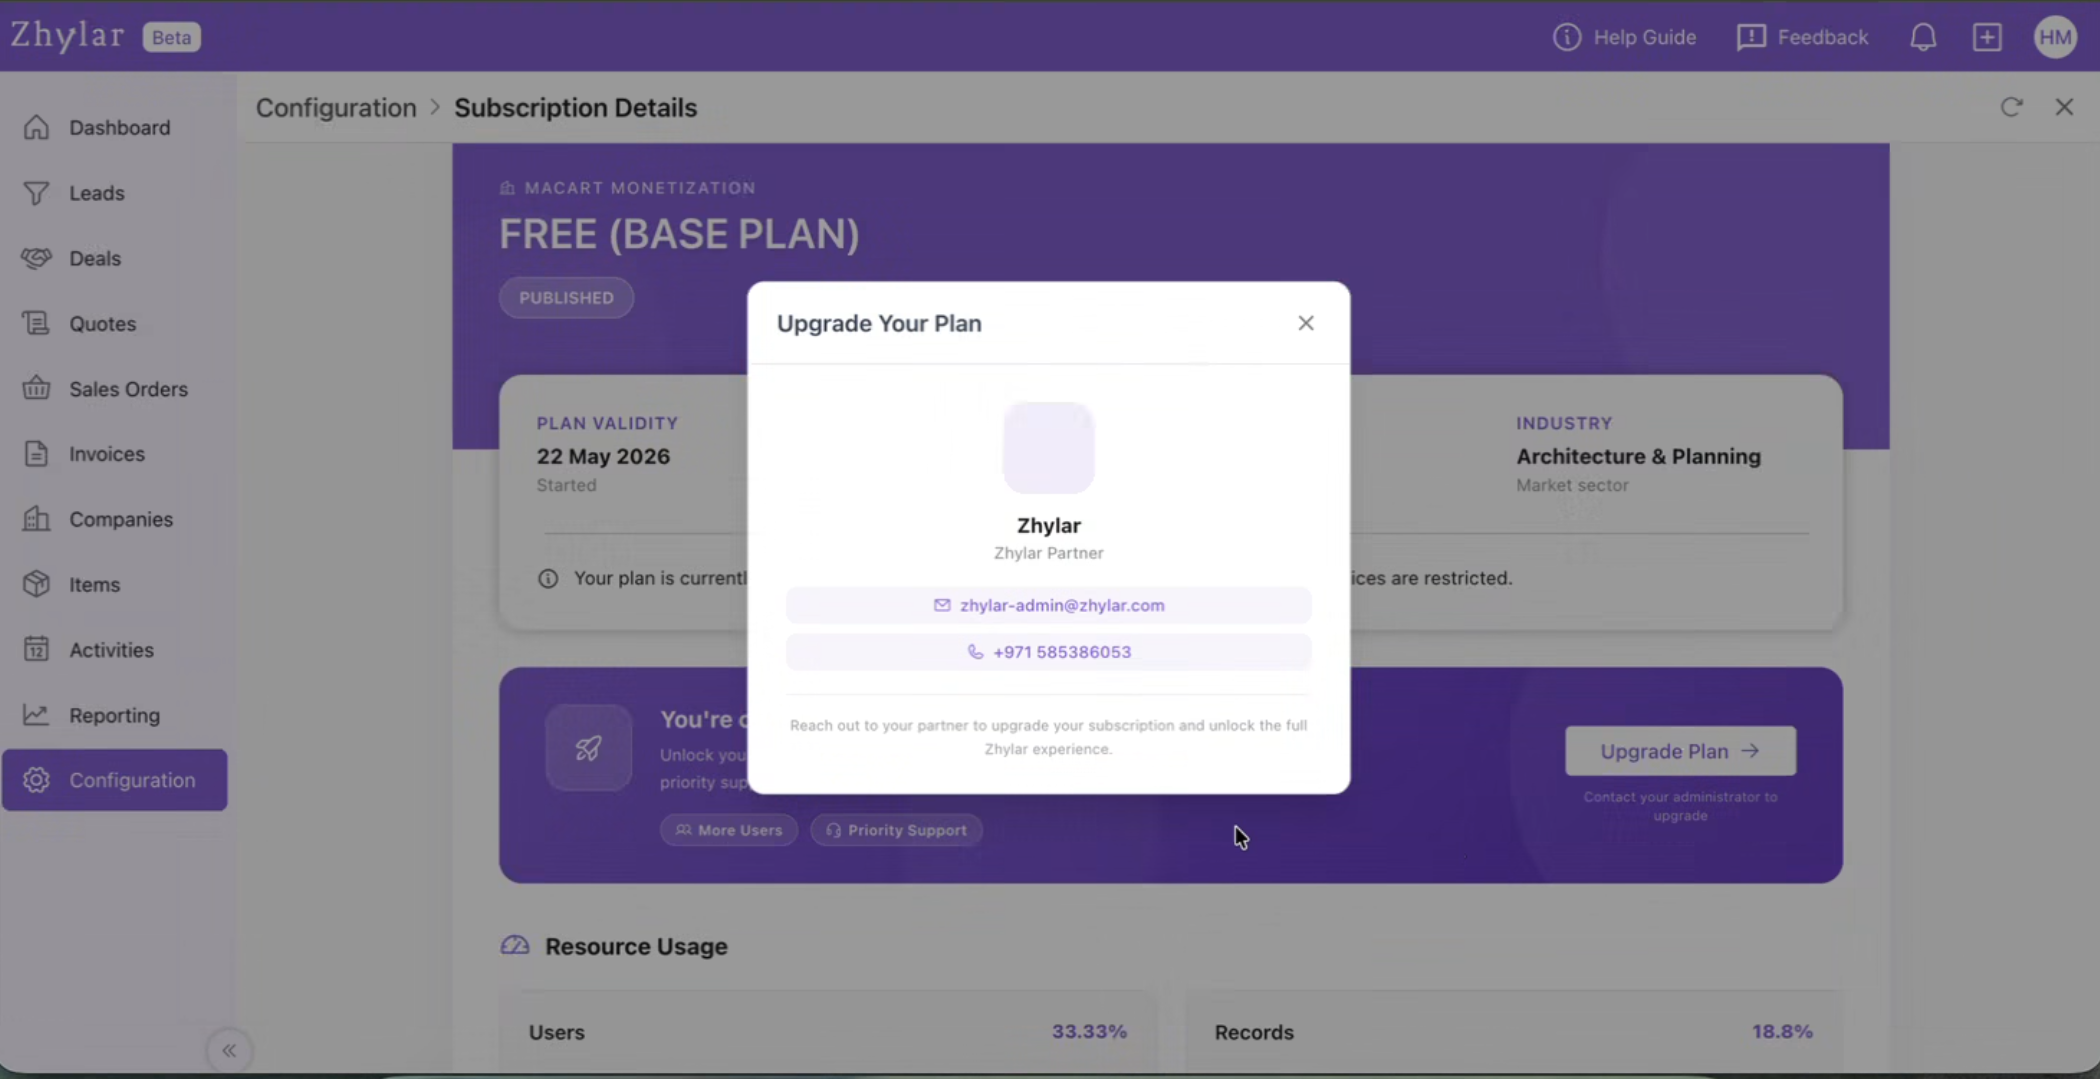
  • They must connect with Zhylar partner.  
  • The partner can then assign a paid subscription to their organization.  

Note: 

  • The Free Signed up user/org. will always be assigned to Zhylar partner directly. 

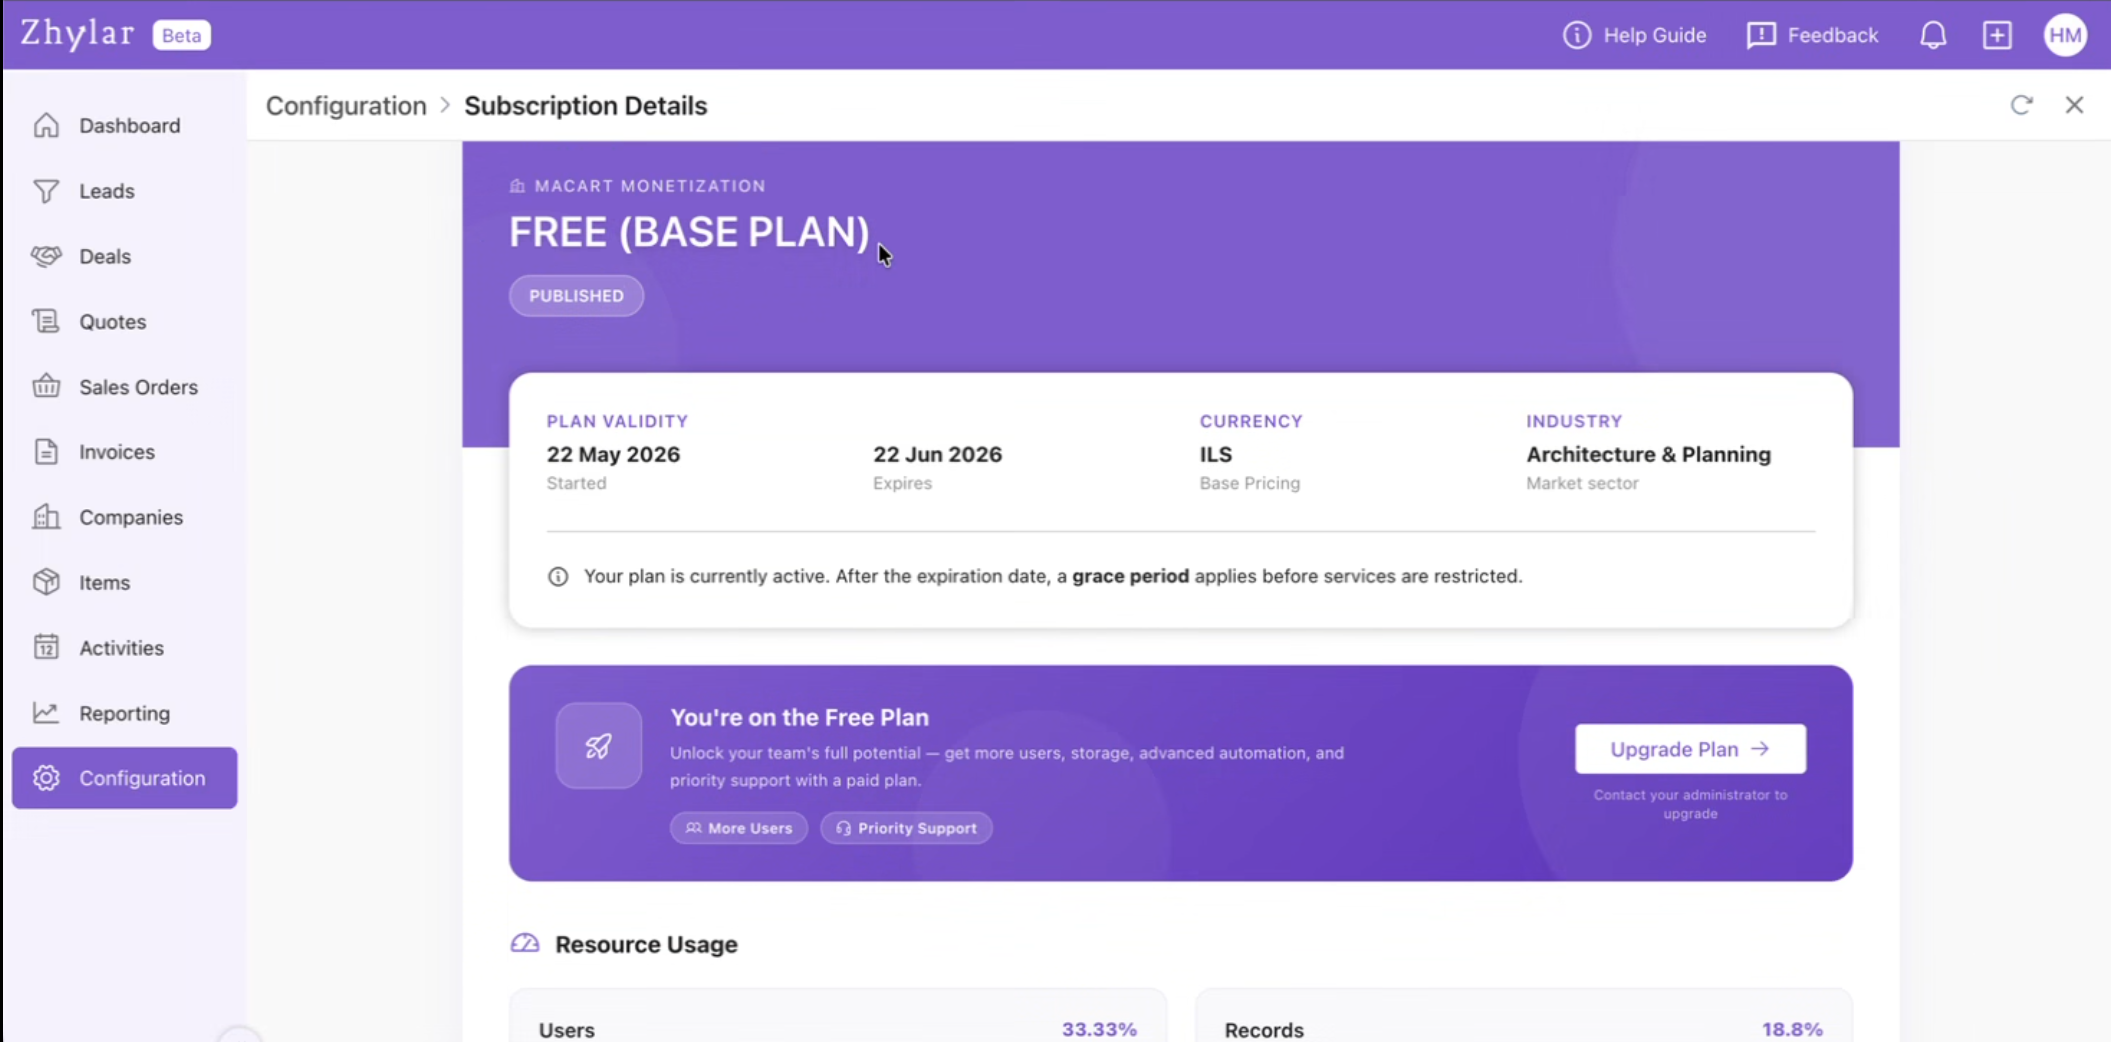
 What Subscription is Assigned to Free Sign-Up Organizations

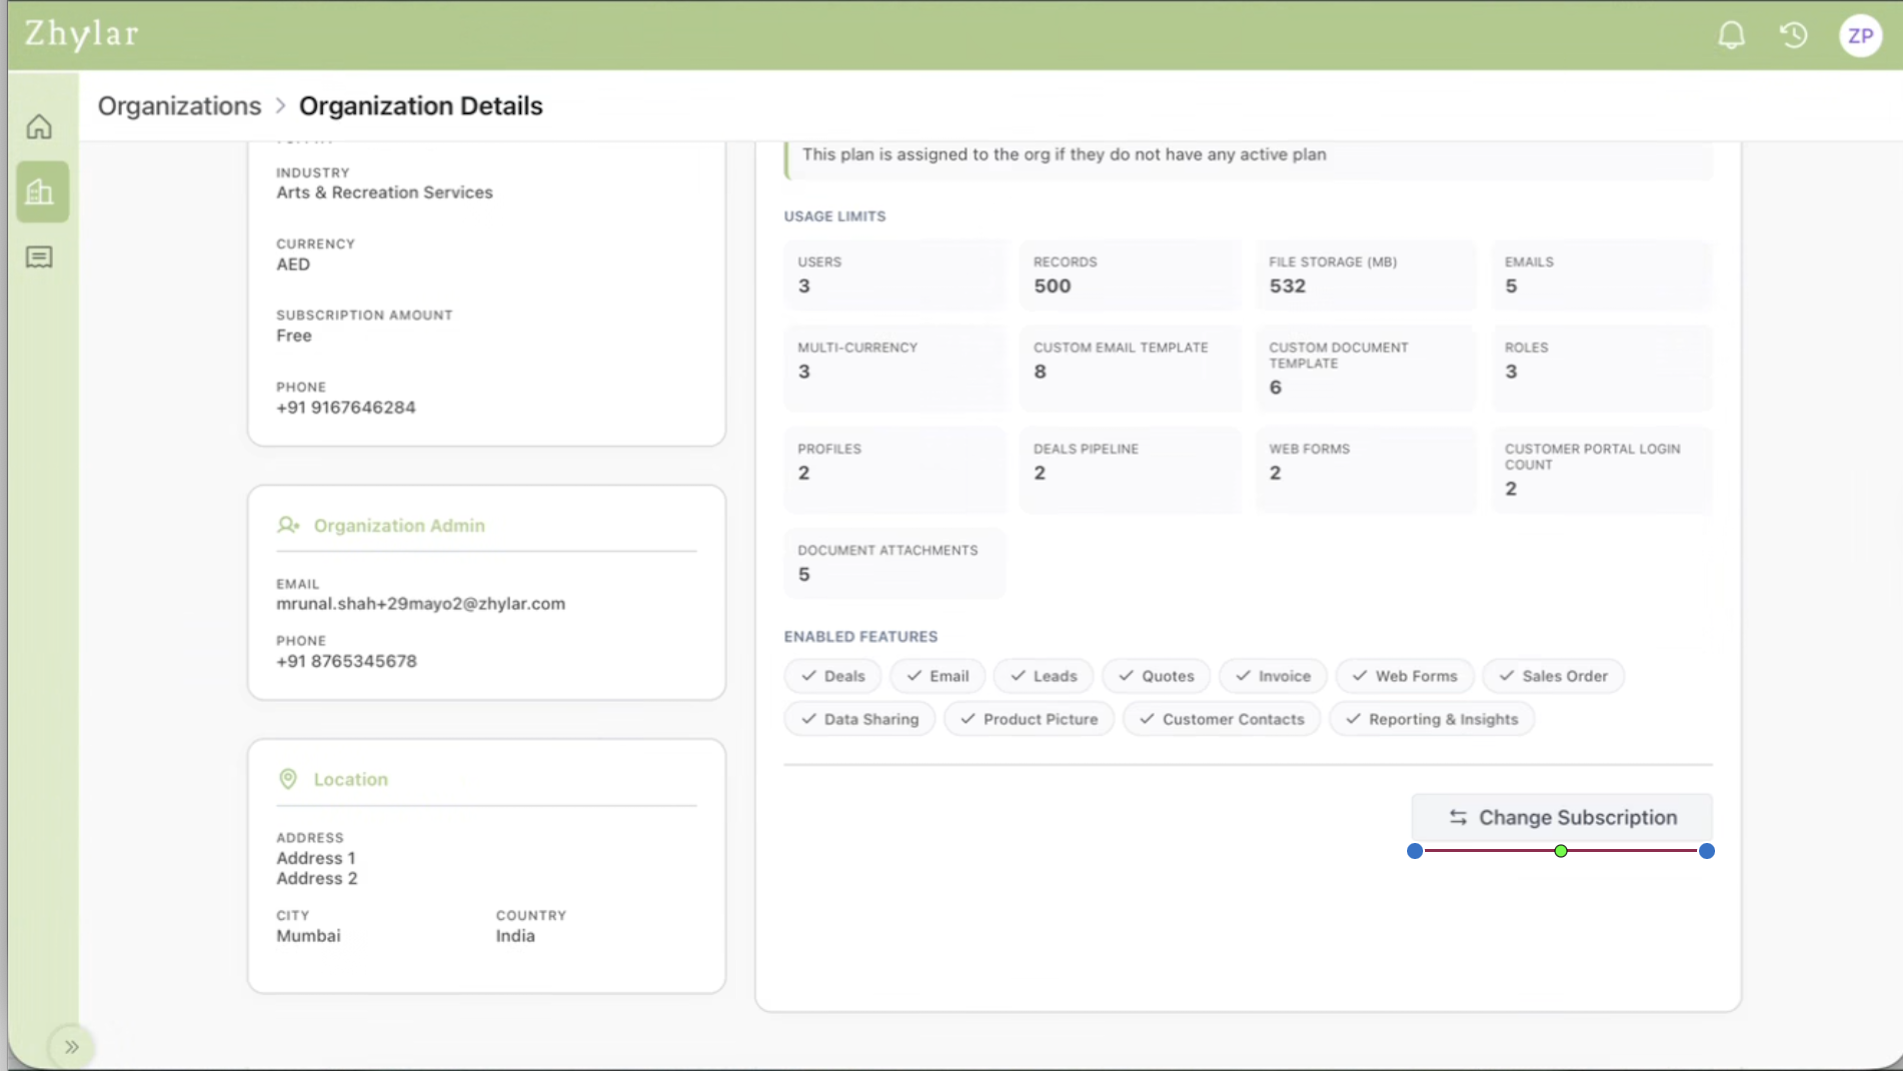
Organizations created through self-sign-up are automatically assigned the Freemium Plan with a Year validity. 

About the Freemium Plan 

The Freemium Plan allows users to: 

  • Explore Zhylar  
  • Access limited platform functionality  
  • Use the system without payment  

This plan is intended for trial, evaluation, and exploration usage purposes. 

Users who require advanced features or higher limits must be upgraded by a partner to the Standard Plan. 

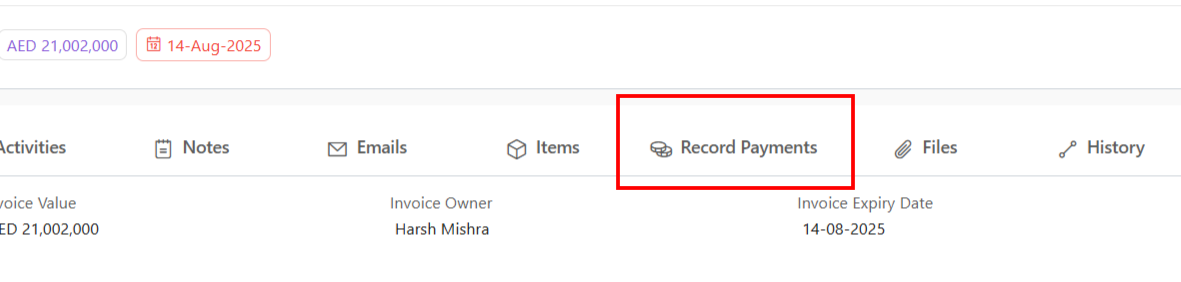
 Where Can I Check My Invoices?

Partners can view all subscription invoices directly from the billing or invoicing section within the partner portal. 

Invoice Details Include 

  • Invoice number  
  • Organization Name 
  • Subscription details  
  • Billing period  
  • Amount charged  
  • Payment status  
  • Due date  

Partners can also download invoices for accounting or record-keeping purposes. 

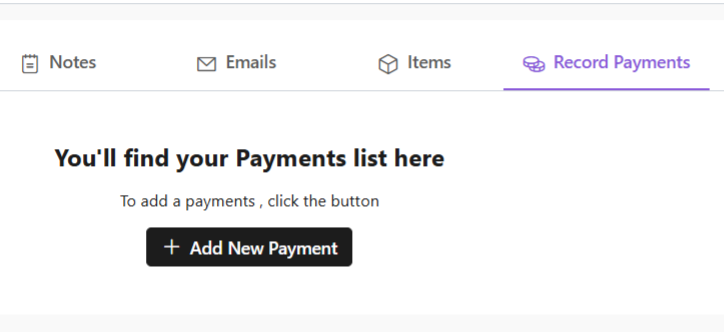
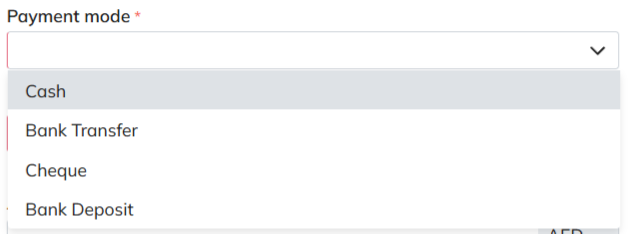
 How Can I Pay for a Subscription?

Subscription payments are managed through the partner portal. 

Steps to Make a Payment 

  1. Log in to the partner portal.  
  2. Go to a detail view for an Organisation where you would like to assign a subscription. 
  3. Select a desired Plan 
  4. Checkout the selected plan details 
  5. Pay for the Plan and the addons 
  6. Complete the payment using the available payment methods.  

Once payment is successful: 

  • The subscription gets assigned and the Organization is activated 
  • In case of Renewal, the subscription remains active without interruption.  

Additional Notes 

Standard Plan Pricing 

Zhylar’s paid subscription plan is called the Standard Plan. 

Pricing 

  • $9/user/month — billed monthly  
  • $6/user/month — billed annually 

Need Assistance? 

For platform support, billing queries, or subscription-related assistance, please contact the Zhylar support team at enquiry@blog.zhylar.com. 

Frequently Asked Questions (FAQs) 

Q) Can end users directly buy paid subscriptions?

No. End users cannot directly purchase paid subscriptions from the Zhylar platform. All paid subscriptions are managed and assigned through authorized Zhylar partners. If a user wants to upgrade from a free plan or purchase a paid subscription, they must contact a partner who will help them choose the appropriate plan and assign it to their organization. 

 Q) Can partners upgrade self-signed-up users?

Yes. Partners can upgrade users who initially created their accounts through the free self-sign-up process. Once the partner identifies the user or organization in the system, they can assign a paid subscription plan based on the customer’s business requirements. This allows self-signed-up users to move from the Freemium Plan to a Standard or higher-tier plan without needing to create a new account. 

Q) What plan do self-sign-up users receive by default?

Users who register through the “Create Account” option on the Zhylar login page are automatically assigned the Freemium Plan. This free plan allows users to explore the platform and access basic features with limited functionality and usage limits. If users require advanced features or higher limits, a partner can later upgrade them to a paid subscription plan. 

 Q) Can partners assign subscriptions during onboarding?

Yes. Partners can assign subscription plans while onboarding new users or organizations into the platform. During the onboarding process, partners can select the required subscription tier and activate it immediately for the customer. This ensures that the organization receives access to the correct features, limits, and functionalities from the beginning itself. 

 Q) Can Add-Ons be assigned to Freemium Plan users?

No. Add-Ons can only be assigned to organizations with an active paid subscription. Organizations on the Freemium Plan must first upgrade to a paid plan before any Add-On can be activated. 

Q) Can Add-Ons be added after onboarding?

Yes. Partners can add Add-Ons at any time during an active subscription period, provided the organization has an active paid plan. 

Q) Are Add-Ons charged for the entire billing cycle?

Not always. Add-Ons are generally billed on a pro-rata basis according to the remaining duration of the organization’s subscription period, subject to the minimum billing rules applicable to the plan. 

Q) Can invoices be downloaded?

Yes. Partners can access and download invoices directly from the billing or invoicing section within the partner portal. Invoice details typically include subscription information, billing period, payment status, invoice amount, and due dates. Downloaded invoices can be used for internal accounting, documentation, and record-keeping purposes. 

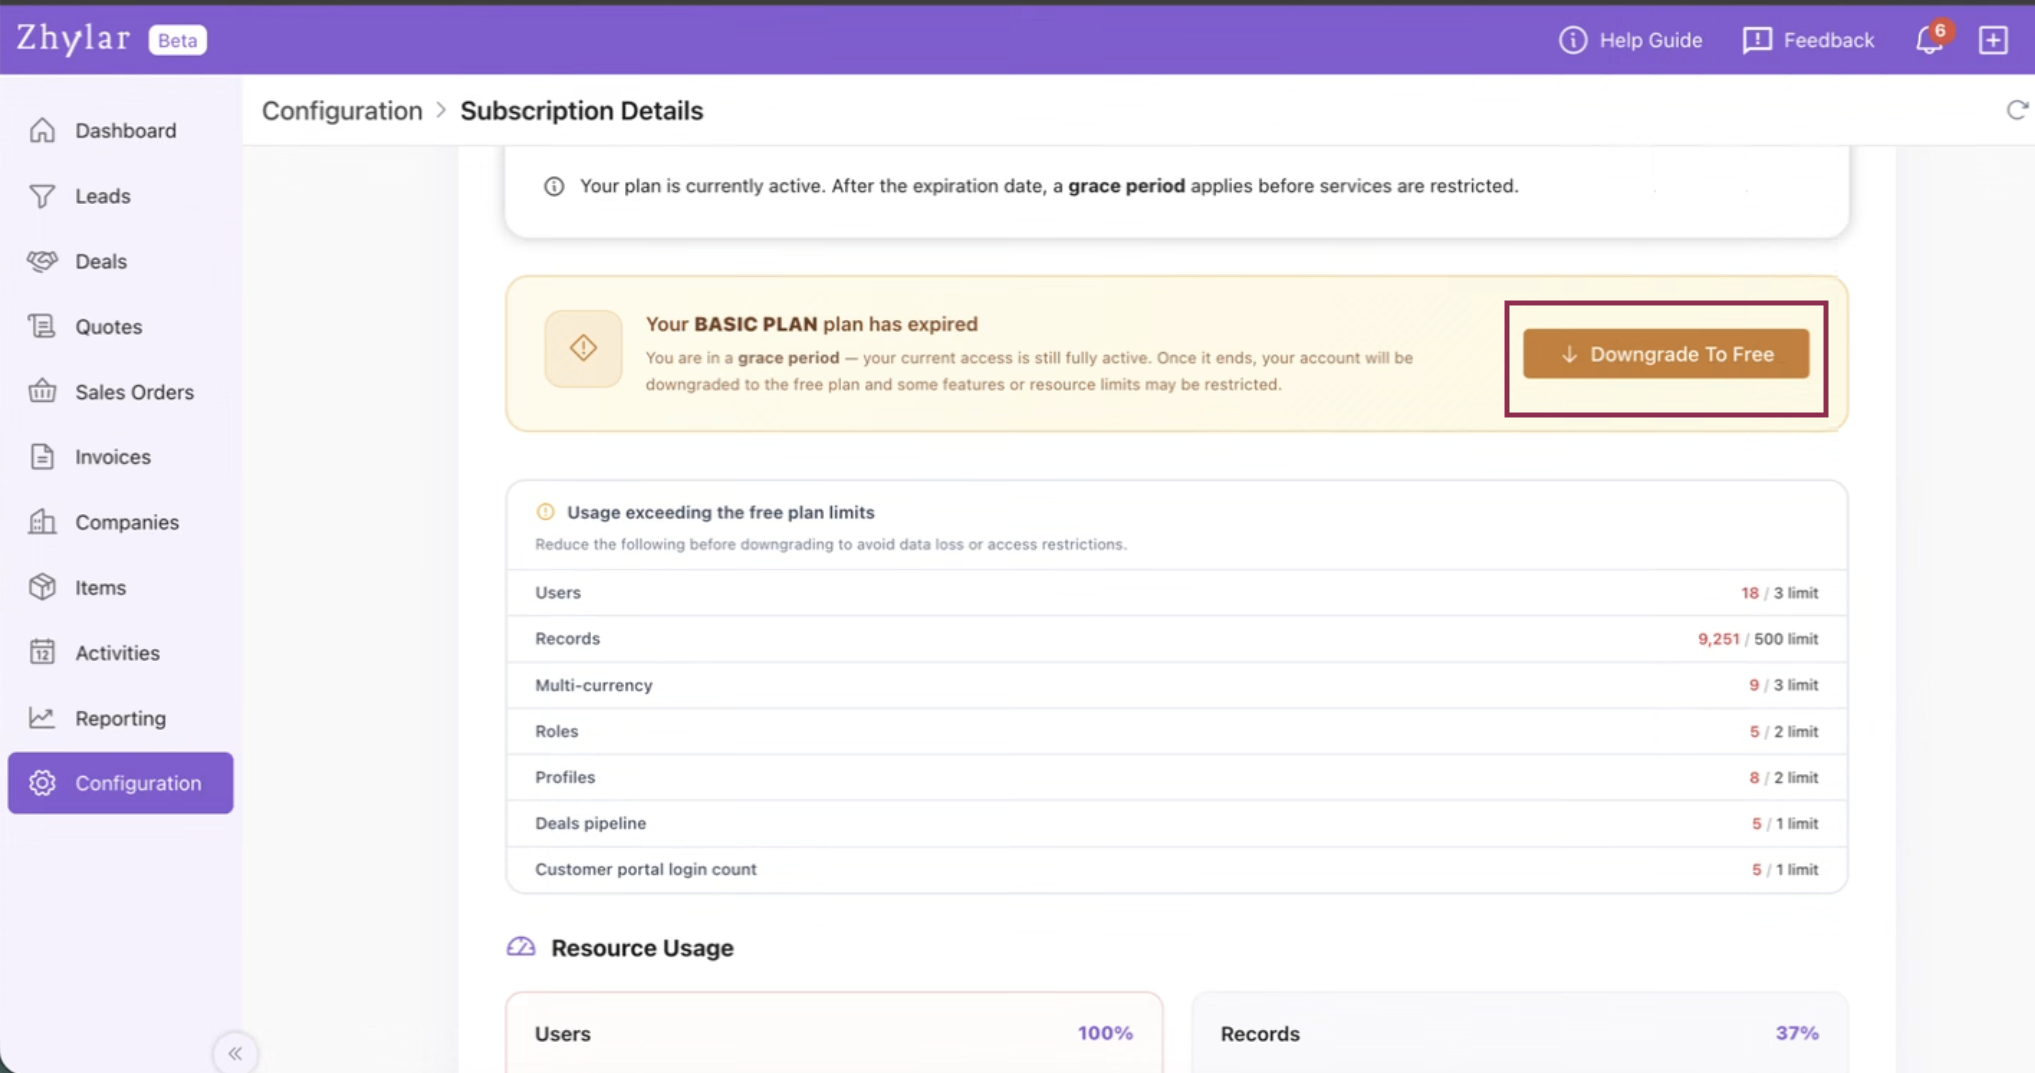
 Q) What happens if payment is not completed?

If payment is not completed within the applicable due period, the subscription may eventually expire based on Zhylar’s billing and subscription policies. Once expired, the account may move into a grace period where users can still access and export existing data, but certain operational activities and premium features may be restricted. Continued non-payment may result in further access limitations until the outstanding payment is cleared or the subscription is renewed. 

Understanding Zhylar Subscriptions, Renewals & Account Management

This guide is designed to help you understand how subscriptions work within Zhylar, from getting started with a free account to upgrading, downgrading, renewing, or managing an existing subscription. It also covers important information related to payment terms, plan features, subscription expiry, and account access after a plan expires. 

Whether you are exploring Zhylar for the first time or are already using the platform, this article will provide a clear overview of the available subscription options and the processes associated with them. It will also help you understand what to expect when changing plans, renewing your subscription, or transitioning to the Freemium Plan. 

How to AccessZhylar 

There are two ways users can access Zhylar: 

Option 1: Free Sign-Up (Self-Service) 

Users can start with a free trial directly from the login page. 

How to Sign Up for Free 

  1. Go to the Zhylar login page. 
  2. Click on Create Account. 
  3. Complete the registration process. 
  4. Start using the Freemium plan. 

This option allows users to explore Zhylar before moving to a paid subscription. 

Option 2: Paid Subscription via Partner 

Users cannot directly purchase paid subscriptions from within the Zhylar platform. To upgrade to a paid plan, you can get in touch with Zhylar Support, and they will assign you an authorized Zhylar Partner, who will guide you through the available subscription options and help activate the most suitable plan for your organization. 

How Paid Subscription Works 

  1. Contact Zhylar Support. 
  2. Choose the required subscription plan. 
  3. The partner will assign the selected plan & activate it to your account. 
  4. You can then log in and start using the subscribed plan. 

The partner will also handle all aspects of the onboarding process and set up your subscription with Zhylar. 

Option 3: Existing Freemium User Upgrading to the Standard Plan 

If you already have a Zhylar account under the Freemium Plan and would like access to additional features, higher limits, or premium functionality, you can upgrade your existing organization without creating a new account. 

How to Upgrade from Freemium to Standard 

  1. Contact your authorized Zhylar Partner.  
  2. If a partner is not available, contact Zhylar Support via Email or WhatsApp.  
  3. Discuss your requirements and select the appropriate subscription plan.  
  4. Complete the subscription process.  
  5. The Standard Plan will be assigned to your existing organization.  
  6. All your existing data, records, contacts, and configurations will remain intact during the upgrade process. 

Types of Plans Offered by Zhylar 

Zhylar offers multiple subscription plans designed to support different business requirements and operational needs. 

Currently, Zhylar offers the following plans: 

Freemium Plan 

You can revise that paragraph as follows: 

The Freemium Plan allows users to access Zhylar at no cost and explore its core features. While most key functionalities are available, the Freemium Plan comes with predefined usage limits and capability caps on certain features. This plan is automatically assigned to users who register through the free self-sign-up process.  

Additionally, users who choose to downgrade from a paid subscription or decide not to renew their existing plan may continue using Zhylar under the Freemium Plan, subject to the features and limits available within that plan. 

Standard Plan 

The Standard Plan is Zhylar’s paid subscription plan that that allows users to have full access to the advanced features, higher usage limits, and enhanced functionality. 

Standard Plan Pricing 

  • $9/user/month — billed monthly  
  • $6/user/month — billed annually  

Paid subscriptions are assigned only through authorized Zhylar partners.

Subscription Tiers & Add-Ons  

Zhylar may offer multiple subscription tiers, and add-ons. Features and usage limits may vary between plans, and certain functionalities may be modified, added, or removed over time as part of product improvements and business optimization. 

Add-Ons 

Add-Ons provide users with a way to increase their current usage limits without having to upgrade their entire subscription. 

Example 

A subscription will typically come with a fixed number of records by default. Rather than upgrade to a higher plan, a user can buy additional records separately, at an additional cost. 

Currently, Zhylar provides the following Add-Ons as given below. 

It is important to note that the pricing of add-ons will likely differ, depending on whether the subscription you are using is being billed either on a monthly or annual basis. 

Billing Cycle & Payment Terms 

Zhylar subscriptions may be billed on either: 

  • A monthly basis  
  • A yearly basis  

The billing frequency will depend on what type of subscription the user chooses. 

Users are responsible for maintaining valid payment details to avoid interruptions in service. 

Accepted Payment Methods 

Zhylar accepts the following methods of payment: 

  • Credit Cards  
  • Debit Cards  
  • Online Payment Gateways  

If payment remains incomplete or fails beyond the due period, Zhylar reserves the right to temporarily suspend or restrict platform access until payment is successfully completed. 

Users remain responsible for all applicable subscription charges, taxes, and payment liabilities. 

Managing Your Subscription 

During your subscription period, you may want to upgrade, downgrade, or manage your plan. 

 Upgrading Your Plan 

If you are currently using the Freemium plan and want to move to a paid plan: 

Steps to Upgrade 

  1. Log in to your Zhylar account.  
  2. Navigate to: Configuration > Subscription Details 
  3. Click on the Upgrade Plan button and it will display the Zhylar Partner details. 
  4. Contact Zhylar Support. 
  5. Inform them that you want to upgrade your subscription. 
  6. The partner will handle the upgrade process. 

Once completed, your account will be updated with the new plan and features. 

Downgrading Your Plan 

Users on a paid plan can move back to the free plan. 

How Downgrading Works 

Log in to your Zhylar account. 

Navigate to: Configuration > Subscription Details 

Click on the downgrade option. 

A confirmation screen will appear showing: 

Your current plan usage 

Features currently available 

Features available in the free plan 

Limitations after downgrade 

Review the comparison carefully. 

Confirm the downgrade request. 

Once confirmed, your account will be moved to the free plan.  

Important Note About Downgrades 

Before downgrading, users will be informed about: 

  • Feature limitations 
  • Usage restrictions 
  • Data or functionality changes 

It is also important to note that the downgrade is only possible if the parameters and usage limits are under or equal to freemium limits.  User can fit into these limits by deleting or inactivating records under that parameter 

This information helps users make an informed decision before switching plans. 

Cancelling a Subscription 

End users cannot directly cancel subscriptions. 

How Cancellation Works 

  • Subscription cancellations are handled only by the partner. 
  • Partners can stop recurring billing for future renewals. 
  • Existing subscription periods cannot be shortened. 

 Refund Policy 

Zhylar does not provide refunds for active subscription periods. 

If recurring billing is cancelled: 

  • Your current subscription remains active until the expiry date. 
  • Access continues until the plan officially expires. 

What Happens When Your Subscription Ends 

Zhylar provides multiple reminders before your subscription expires. 

However, in the case of Freemium plan, the plan will be auto renewed by the system and does not need any action by the customer or the partner. 

Expiry Notifications 

Prior to subscription expiry, renewal reminders may be sent through: 

  • In-app notifications  
  • Email notifications  
  • Other system alerts  

Renewal Timeline 

  • Yearly subscriptions → Notifications begin 15 days and 7 days before expiry  
  • Monthly subscriptions → Notifications begin 3 days before expiry 

Important Renewal Information 

Subscriptions must generally be renewed through the same channel from which they were originally purchased. 

Example 

  • If purchased through a Channel Partner → Renewal must happen through the same Channel Partner.  
  • If purchased directly → Renewal may happen through Zhylar support or designated partners. 

Grace Period After Expiry 

Once the subscription expires, the account is moved to a Grace Period Plan. 

During the grace period: 

  • Users remain on the same plan temporarily 
  • Existing data remains accessible 
  • Users can view their records 
  • Users can export/download their data 

However, certain actions will be restricted. 

Restrictions During Grace Period 

The following actions will not work: 

  • Adding 
  • New records 
  • New Masters 
  • Importing New records 

Following actions can be performed 

  • Login to the system 
  • Read 
  • Export (Existing Data) 
  • All limits are frozen as per the last  
  • Performing new operational activities 

The account becomes view-only until the subscription is renewed. 

For more detailed information about Zhylar subscriptions, and related policies, you may also refer to the Terms & Conditions (Points 11, 12 and 13) section available on Zhylar’s website. 

Need Help Choosing a Plan? 

For subscription-related assistance, upgrades, renewals, or billing support, please contact your Zhylar partner or email us at enquiry@blog.zhylar.com or WhatsApp us at +971585386053. 

Frequently Asked Questions (FAQs) 

Q) Can I buy a paid subscription directly fromZhylar?

Here’s a revised version incorporating that point naturally: 

No. Paid subscriptions cannot be purchased directly through the Zhylar platform. All paid subscriptions are typically managed through authorized Zhylar partners. If you would like to upgrade from a free plan or subscribe to a paid plan, you can contact a Zhylar partner, who will help you select and assign the most suitable subscription based on your business requirements. If a Zhylar partner is not available in your region, you may alternatively contact Zhylar Support or the Sales team through WhatsApp for assistance with plan selection, subscription activation, and onboarding. 

Q) Can I start using Zhylarfor free? 

Yes. Users can start using Zhylar by signing up through the “Create Account” option available on the login page. Once the registration process is completed, a free organization will automatically be created and assigned the Freemium Plan. This allows users to explore the platform and use basic features without making any payment. 

Q) I am currently using Zhylarunder the beta program. How long will I continue to have free access? 

 As an existing beta user, you will continue to enjoy full access to all Zhylar features at no cost until 30th June 2026. This extended access period is being provided exclusively to users who joined the platform during the beta phase, allowing them additional time to explore and benefit from the complete Zhylar experience before the transition to the paid subscription model. After this date, an active subscription may be required to continue accessing premium features and functionality. 

Q) How do I upgrade from a free plan?

To upgrade from a free plan to a paid subscription, you must connect with an authorized Zhylar partner. The partner will evaluate your requirements and assign the appropriate paid plan to your organization. Once the upgrade is completed, your account will gain access to the features, limits, and functionalities available under the selected subscription plan. 

Q) Can I downgrade my paid plan?

Yes. Users can downgrade from a paid subscription plan to the free plan directly through the system. During the downgrade process, Zhylar will guide you through the required confirmation steps and explain the impact of moving to a lower plan, including any feature or usage limitations that may apply after the downgrade is completed. 

Q) Can I cancel my subscription myself?

No. Subscription cancellation is handled through your authorized Zhylar partner. End users cannot directly cancel subscriptions from within the platform. If you no longer wish to continue your subscription, you will need to contact your partner, who can stop future recurring billing for your account. 

Q) Will I get a refund if I cancel?

No. Zhylar does not provide refunds for active subscription periods. Even if recurring billing is cancelled, your subscription will remain active until the end of the current billing cycle. Users will continue to have access to their existing plan features until the official subscription expiry date. 

Q) What happens after my subscription expires?

Once your subscription expires, your account will automatically move into a grace period. During this period, you will still be able to log in, access existing records, and export your data if required. However, certain operational actions such as creating invoices, adding masters, or creating new records will be restricted until the subscription is renewed or upgraded again.

Q) Will I receive expiry reminders?

Yes. Zhylar sends multiple subscription expiry reminders through in-app notifications, emails, and other system alerts to help users renew their subscriptions on time. 

  • For yearly subscriptions, notifications are sent starting 7 days before the expiry date.  
  • For monthly subscriptions, notifications are sent starting 3 days before the expiry date.  
  • These reminders are intended to help users avoid interruptions in access or functionality. 

Configure Leads Generation

Let’s understand how to connect Google Lead Forms with Zhyalr CRM, configure webhooks, and verify data flow.

Getting Started- Connect Google to Zhylar CRM

  • Log in to Zhylar CRM.
  • Go to Configuration.
  • Navigate to Lead generation.
  • Select Google/Facebook and click Connect.
  • Choose the Google/Facebook account you want to link.
  • Click Continue through the consent screens.

What access does Zhylar have to this data?

Zhylar.com has the following access to your Google ads account:
  1. See, edit, create and delete your Google Ads accounts and data
    • This app wants permission to do anything that you can do on your Google Ads account, including:
    • See your performance data
    • Create, edit or delete your campaigns, ad groups and ads
    • Create, edit or delete your bidding targeting and scheduling settings
    • Set and change your budgets
    • See, apply and dismiss your recommendations
    • Edit your billing settings
    • There may be sensitive information in your accounts, such as financial information or performance metrics.
    • If your Google Account’s access is limited to read-only access, email-only access or any other restriction, then this app’s access will be limited in the same way. For example, if you only have read-only access to the account, then this app will be able to pull reports but not make changes to the account.
    • Over time, the app’s ability to access this account will follow that of your Google Account. So if your access to the account is revoked, then this app won’t be able to access it either.
  2. See your personal info, including any personal info you’ve made publicly available –
    • This app wants permission to:
    • See your full name
    • See your profile picture
    • See your gender
    • See your preferred languages
    • See any other information that you’ve made publicly available
  3. See your primary Google Account email address
    • This app wants permission to:
    • See the primary email address associated with your Google Account
  4. Associate you with your personal info on Google
    • This app wants permission to:
    • Know who you are on Google and associate you with the personal info you have made public “

Generate webhook details

  • After successful connection, copy the Webhook URL shown on the Zhylar screen.
  • Paste this webhook URL into your Google Ads Lead Form settings.
  • Copy the API key / secret key provided by Zhylar.

Send test data from Google

  • In Google Ads, use the Send test data option for the connected lead form.
  • Submit a test lead to trigger the webhook.

Step 4: Verify data in Zhylar CRM

  1. Return to your Zhylar screen.
  2. Open the Leads section.
  3. Confirm that the test lead has been received.
  4. Verify that all relevant fields (name, email, phone, campaign details, etc.) are populated correctly.
For a demo of the entire process, please watch the video below:
https://youtu.be/LLykGXa07tA?si=3qZp6zf_UiEIIfgY
Discover how Zhylar can streamline your sales and elevate your business processes. Visit our website or book a demo today to experience the difference!

Also Read

Web Forms Leads Import Leads Lead Pipelines

Bank Details

In a CRM system, bank details refer to the financial information of customers, vendors, or partners. This information is utilized for billing, invoicing, refunds, and financial transactions within the platform.
  • Log in to Zhylar
  • Go to Left-hand navigation panel
  • Click on Configuration
  • Under Profile tab, select Bank Details.
  • Shows a list of all the saved banks.
  • Bank marked with purple star is primary bank.
  • In Zhylar CRM, a primary bank is the default account managing payments, refunds, and transactions.
  • This bank will be loaded by default in all the Add Invoice forms.
  • You can switch the Bank in the document if required.
  • Click + New Bank.
  • Fill out the details.
  • Fill required data.
  • Click Save.
  • Toggle to mark as primary.
  • Only one primary bank allowed.
  • Primary bank denoted by a white star in a purple circle.
  • A primary bank cannot be deleted.
  • When a bank is added to any document, the field drop down will carry the bank’s nick name.
  • E.g., Dubai National Bank- Al-Nahda branch -> Nickname: DNB Al-Nahda
  • Thus drop down will show “DNB Al-Nahada” as an option.
  • Click ⋮ 3 dots
  • Select Update.
  • Edit details.
  • Save changes.
  • Click ⋮ > Delete.
  • Confirm with Yes.
Note:
  • Action cannot be undone.
  • A bank marked as primary cannot be deleted.
  • Two banks can not have the same Nick Name.
Navigate to Invoice
  • Go to Dashboard
  • From the left-hand navigation panel, go to Invoices
  • Select Invoice:
    • Open the relevant invoice.
    • Invoice must be in Sent status or any of the successive stages.
  • Record Payment:
    • Click “Record Payment”
  • You’ll find your Payments list.
  • Add New Payment:
    • Click “+ Add New Payment”
    • Fill required details.
    • When selecting mode of payment, except cash, all other payment modes will require you to add a bank.
  • Under “deposit to” field, add your bank.
  • If payment is being made in cash, you will not have to add a bank.
  • Fill data and click “Add Payment”.
  • Your payment receipt will be added.
Units of Measurement General Settings Currencies  

Organization Details

  1. Log in to Zhylar
  1. Go to Left-hand panel
  2. Go to Configuration
  3. Under Profile section, select Organization Details
  1. A new page will open for you.
  1. View Organization details.
  1. Click on the yellow button “Update Organization”.
  1. Make your changes.
  1. The following details cannot be changed:
    • Legal start date
    • Base Currency
    • Discount
  2. Click Save.
Units of Measurement General Settings Currencies

Email Configuration

Email configuration refers to the setup process that connects your business email account (IMAP or Outlook) with the CRM. This enables users to send, receive, track, and manage emails directly within the CRM. It ensures centralized communication, improves customer engagement, and supports features like templates, automation, and activity logging.
  • Log in to Zhylar
  • Go to Left-hand navigation panel
  • Click on Configuration
  • Under Integrations tab, select Configure Email
  • A new page will open.
  • Click on “Connect email account” to proceed.
  • Select one of the following email providers to continue.
  • You will be taken to a sign-in page. Fill in your email ID that you want to configure.
  • Select an existing account or add new account.
  1. Click Connect with Outlook.
  1. A Microsoft sign-in prompt appears.
  1. Authenticate with your Microsoft credentials.
  2. Your email has been configured.
Note: One user can configure one email ID only.
Use this option when connecting a non-OAuth email provider (for example, a company-managed mail server).

Step-by-step instructions

  • Open the email integration settings in Zhylar.
  • Select Custom IMAP/SMTP as the connection method.
  • Enter the required email server details:
    • Email address: Enter your full company email address.
    • IMAP host / port: Enter the IMAP server address (e.g., imap.example.com)
    • SMTP host / port: Enter the SMTP server address (e.g., smtp.example.com)
  • Username and password: Enter your company email login credentials.
  • Review the entered server details for accuracy.
  • Click Save to submit the configuration.
  • Once the user completes authentication or enters credentials, Zhylar sends the details to Email Engine for validation.
  • Email Engine will attempt to authenticate and establish IMAP/SMTP or API session.
  • A success or error toast message will be displayed.
  • Once a Success message is received that means you are connected. If an error message is received then user will have to check the details provided above or contact zhylar support team for the same.
After the email account is connected, configure how emails are sent and received within Zhylar.

Sending preferences

  1. Select the default From address (typically the user’s primary email).
  2. Optionally configure an email signature that Zhylar will automatically append to all outgoing messages.

Receiving preferences

  1. Select the email folder to monitor (Inbox is selected by default).
  2. Enable auto-fetch or webhook notifications for incoming emails.
Once the email connection is active:
  1. Inbound emails received via EmailEngine APIs or webhooks flow directly into the Zhylar inbox or configured ticketing workflows.
  2. Outbound emails are sent using EmailEngine’s Submit API, with the process fully managed and abstracted by Zhylar.
This ensures seamless email communication and automation across your CRM workflows. To disconnect your email ID,
  • Click on Disconnect
  • Provide confirmation.
  • Your email account will be disconnect.

Also Read

Units of Measurement General Settings Currencies  

Profiles

In Zhylar, profiles determine what features and functionalities a user can access within the platform. Profiles control “who sees what” based on hierarchy. Profiles define “what a user can do.” This includes creating records, editing data, or generating reports. Zhylar assigns the right profile to ensure every team member has the exact tools they need. This helps them perform their job efficiently without unnecessary clutter or access.
  1. Administrator/Admin
  2. Manager
Permissions refer to the specific actions or data that a user can access within their assigned Profiles. Permissions are more granular than roles. They dictate exactly what each user can do with the data. They also define the features users can see.
  • Read
  • Create
  • Update
  • Delete
  • Export
  • Update Pipeline
  • Email
  • Manage Configuration
To get started, follow these steps:
  • Log in to Zhylar
  • Go to Left-hand navigation panel
  • Click on Configuration
  • Under General Settings tab, select Profiles
  1. You will be able to view all the Profiles as shown in the image below.
  • Two default Profiles are pre-loaded in the system- Administrator and Manager.
  • The Administrator is the CEO. This profile cannot be updated or deleted in any way.

Add New Profile

  1. Click on the “+ New Profile” button.
  1. A new page will open.
  1. Fill out the Profile name and click on the permissions to be provided to the said Profile.
  1. Click on Save to add Profile.
  1. There are 2 default Profile, namely, Administrator and Manager.
  1. The Administrator Profile cannot be edited.
  1. To update a Profile, click on the yellow pen at the end of the Profile you want to edit.
  1. A new page will open.
  1. Update the permissions provided and click Save.
  • Click Save.
To delete the Profile,
  • First click on the yellow pencil to go to Update view.
Now, click on “Delete Profile” at the bottom-right corner of the page.
  • Now, confirm you want to delete the role by clicking on Yes.
  • The role will be deleted.

Also Read

User Management Roles and Data Sharing  

General Settings 

  1. Log in to Zhylar.
  1. Click on “Configuration”.
  1. In the “Masters” column, click on “General Settings”.
  1. A new page will open for you.
  1. Here, you can turn on or turn off the “recent selling price” option.
When turned on, recent selling price is reflected under “Item Details” wherever an item is added in the following modules:
  • Deal
  • Quote
  • Sales Order
  • Invoice
Under the added item, select Item Details
The details will open.
The recent selling price reflects the price at which the item was sold the last time only. In comparison, the recent transaction reflects the entire transaction history of the product in the Zhylar system.

Also Read


User Management

User management is a system that controls access to software or platforms. It assigns role-based privileges such as Admin or Sales Rep. It ensures that users have appropriate permissions based on their roles. This approach enhances data security. It prevents unauthorized access. It also supports regulatory compliance by maintaining control over who can view or modify specific information within the system.
  • Organization Admin has the full system control (configurations/user access). Organization Admin is the CEO.
  • User Status– Tracks invitation (Pending → Active)
  • Password Reset– credential updates
  • Log in to Zhylar
  • Go to Left-hand navigation panel
  • Click on Configuration
  • Under General Settings tab, select User Management.
  • Click +New User”
  • Fill details
  • Save User”
    • To define Profile, add a new Profile from “Profile” module first, if required.
    •  When a new user is added, the status will automatically be updated as “Invited”.
    • Once the user accepts, the status will change to active.
  • Click ⋮ 3 dots
  • Select Update
  • Click Save.
  • Click ⋮ 3 dots
  • Select Change Password
  • “Set Password”
Note: Password can only be changed by the user or system administrator. This is only applicable for a User who has not yet accepted the invite email. The status will reflect Invited.
  • Click ⋮ 3 dots
  • Select “Resend Invitation” to invite user again (password reset email)
  • Organization Admin is the CEO.
  • Only users with specific permissions Can Create, Add, Update, Delete or Resend the Invitation to any user.
  • One email ID can be used to register one user only.
  • Permissions required for user modifications
  • Admins customize workflows/access per role.

Also Read

Currencies Roles and Data Sharing  

Roles and Hierarchies

In a CRM system like Zhylar, roles determine user data access levels. They assign permissions to each user within the organization. Roles ensure data privacy and control by allowing only authorized team members to view, edit, or manage specific records. With hierarchy-based roles, managers can oversee their team’s activities. Individual users focus only on the data relevant to their responsibilities. This setup maintains data security while allowing appropriate visibility based on roles and responsibilities.- Roles (what is your role in your org/designation) Zhylar implements top-down hierarchical role structure. A role in Zhylar decides two important things:
  • Position in company hierarchy – It shows who reports to whom (like CEO → Manager → Sales Rep)
  • Data access control – It defines what each user can see or edit on the Zhylar platform.
  • Log in to Zhylar
  • Go to Left-hand navigation panel
  • Click on Configuration
  • Under General Settings tab, select Roles & Data Sharing
  • When you click on Roles and Data Sharing, you will be taken to a new page.
  • Here, you can see all the roles added to the system. The hierarchy of roles is illustrated like a flow chart.
  • Click ⋮ 3 dots
  • Select View
  • Check details.
  • Click X on the top-right of the box to close.
  • To add a new role, click + New Role
  • Alternately, click on the 3 dots of the Role name under whom you want to add a new Role.
  • Select +Add
  • A side sheet will open.
  • Fill out the details.
  • Click Save.
  • The new role will be added.
Data Access:
 
Data Sharing for Peers: This determines if 2 or more persons are in the same role. They will be able to access each other’s data or not. For example, an organization may have 2 Sales Managers, they are considered peers. So, enabling or disabling this permission will determine if they can gain access (Read/Write/Update/Delete) to each other’s data or not.
  • Click ⋮ 3 dots
  • Select Update
  • Make changes.
  • Click Save.
  • Click ⋮ 3 dots
  • Select Delete
  • You will be required to transfer all associated users under this role to another role.
  • Once you have done the needful, click Save.
  • The role will be deleted successfully.
Note: Hierarchy + Roles = Secure yet collaborative access control.

Also Read

User Management