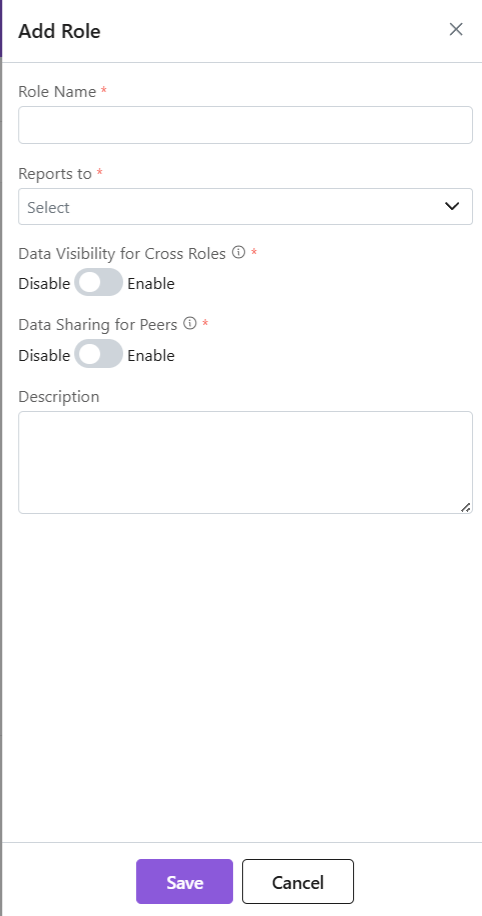
Quotes are formal price proposals you create and share with customers based on their requirements. A quote includes details like products or services, quantities, discounts, taxes, and total value. With Zhylar, you can generate, revise, and send quotes directly from deals. This helps you respond quickly to customers and manage negotiations. It also allows you to move smoothly towards order confirmation.
Getting Started
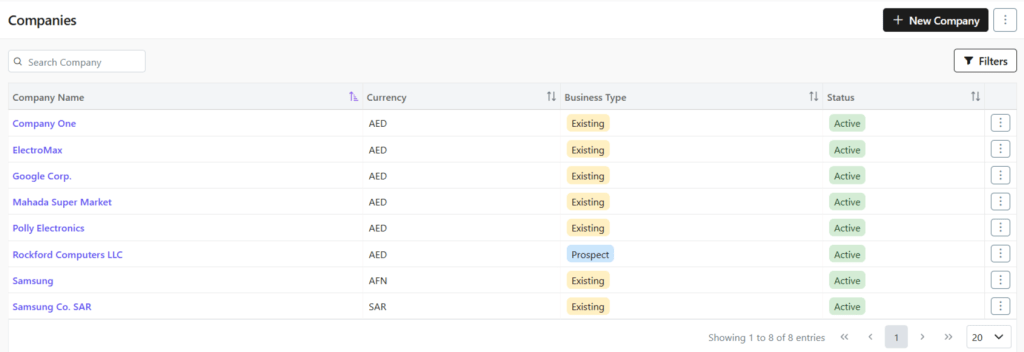
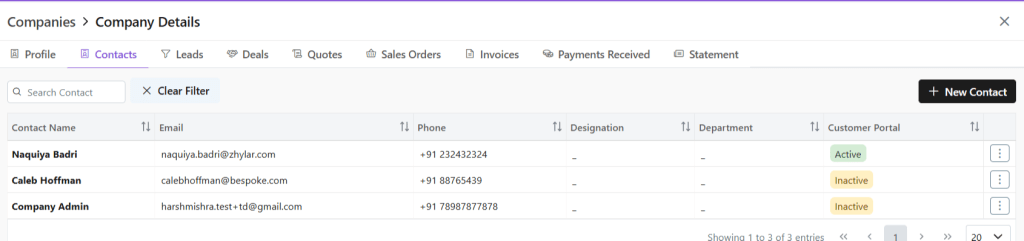
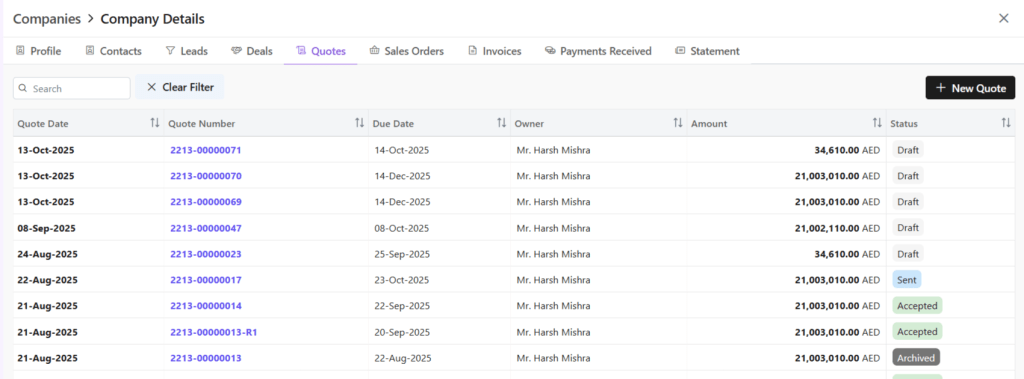
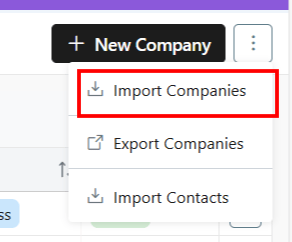
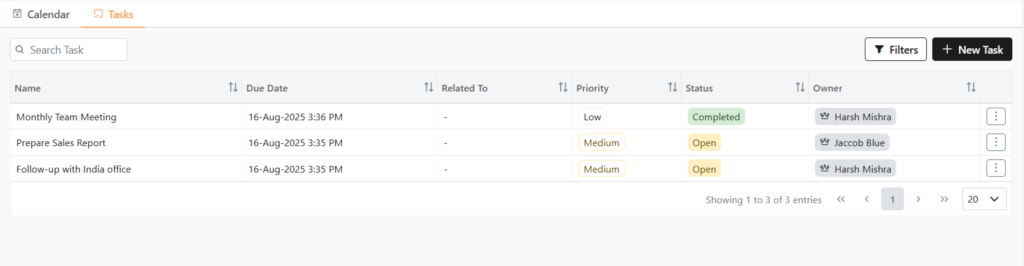
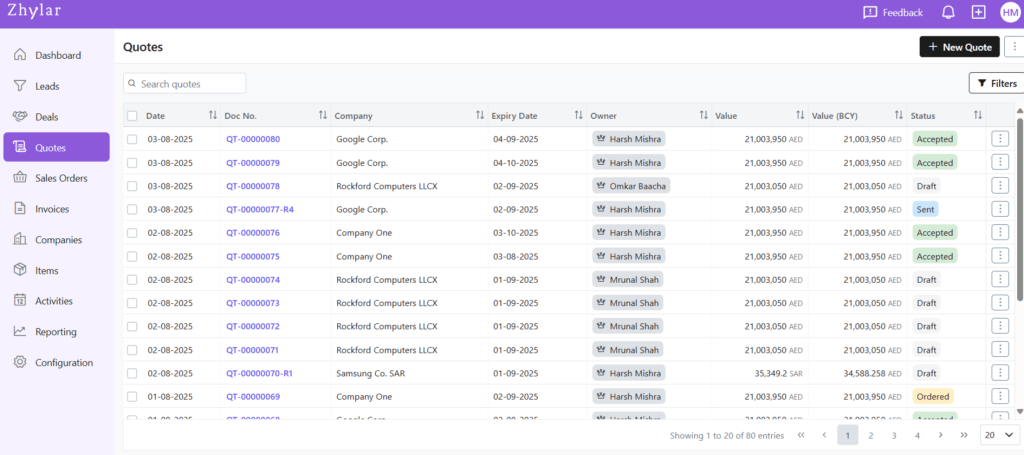
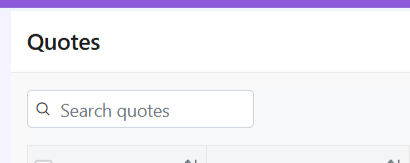
View All Quotes
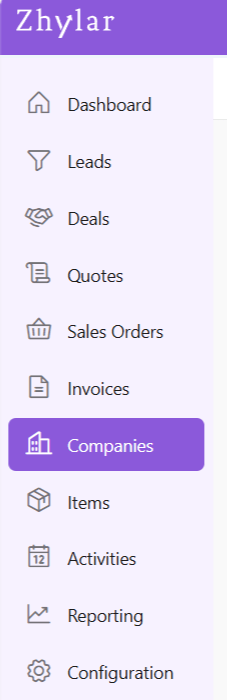
- Log in to Zhylar
- Go to Left-hand navigation panel
- Click on Quotes
- Check the list of quotes in the system
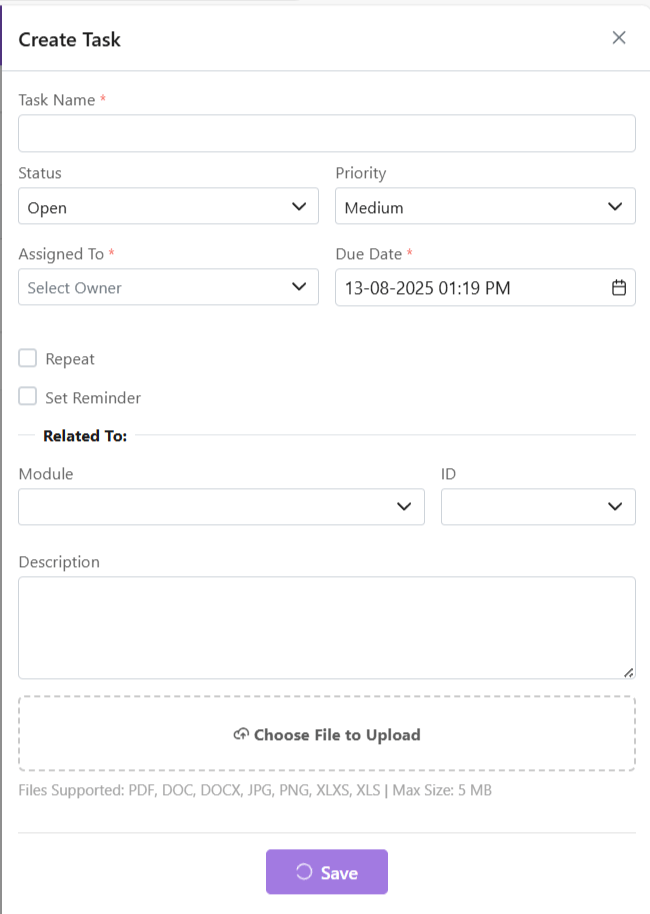
Add New Quote
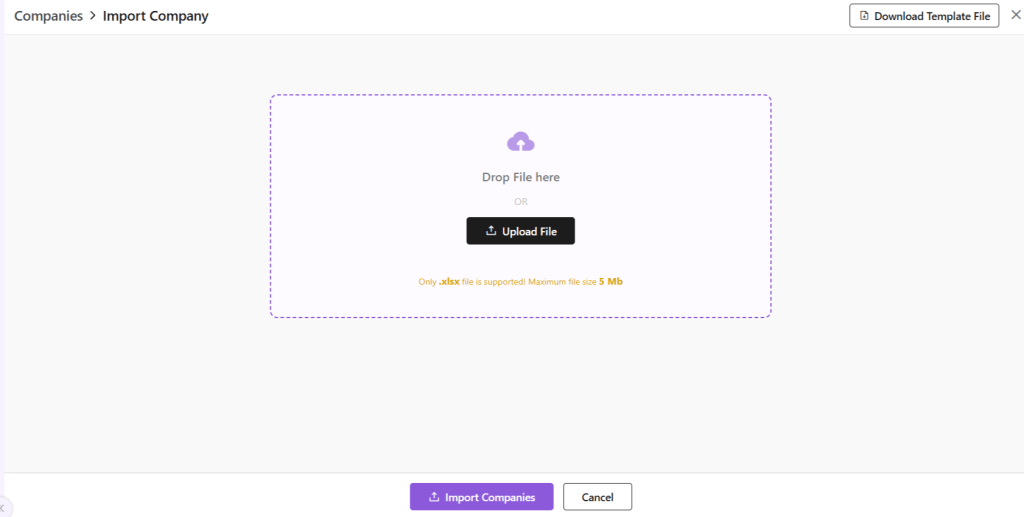
A Quote can be added to the system in several ways.
Quotes Module
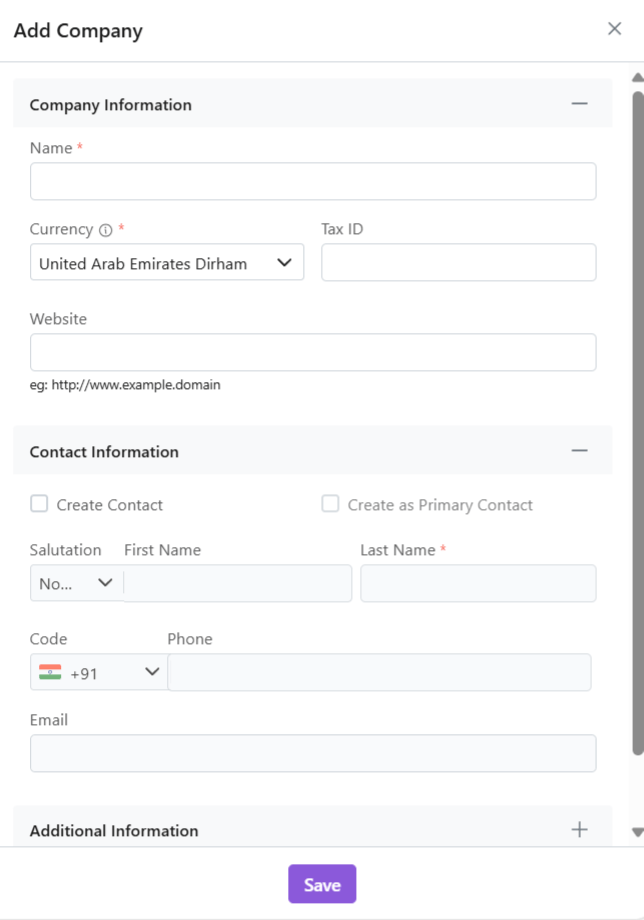
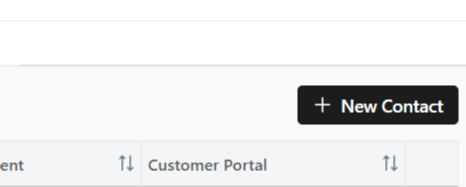
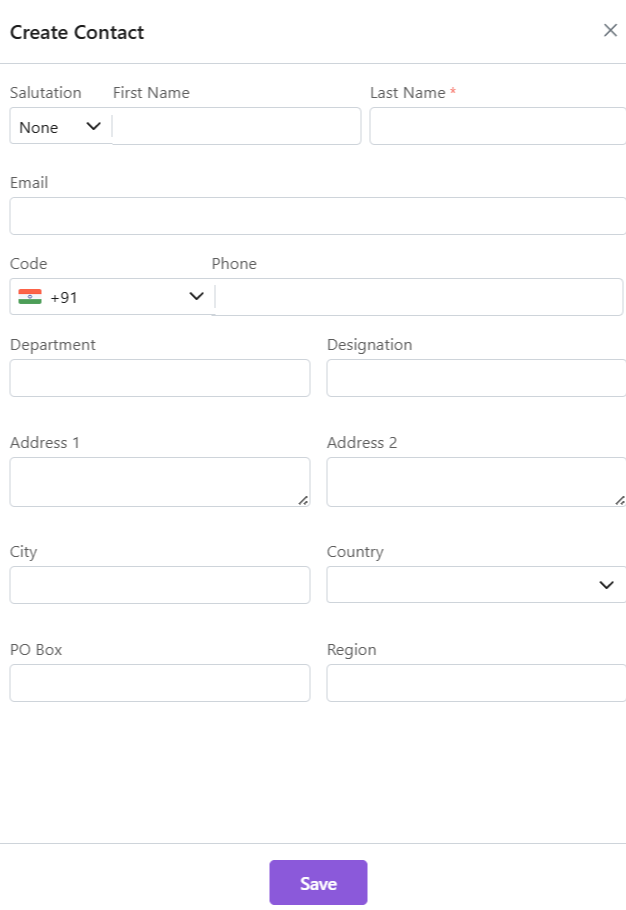
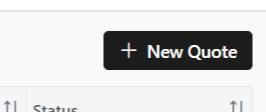
- Click + New Quote
- Fill required details
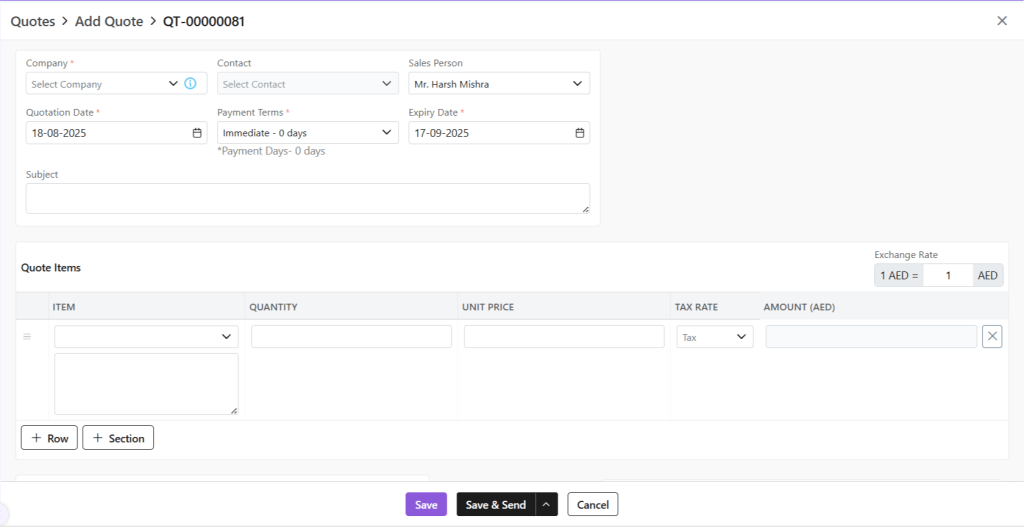
- Fill out the required details
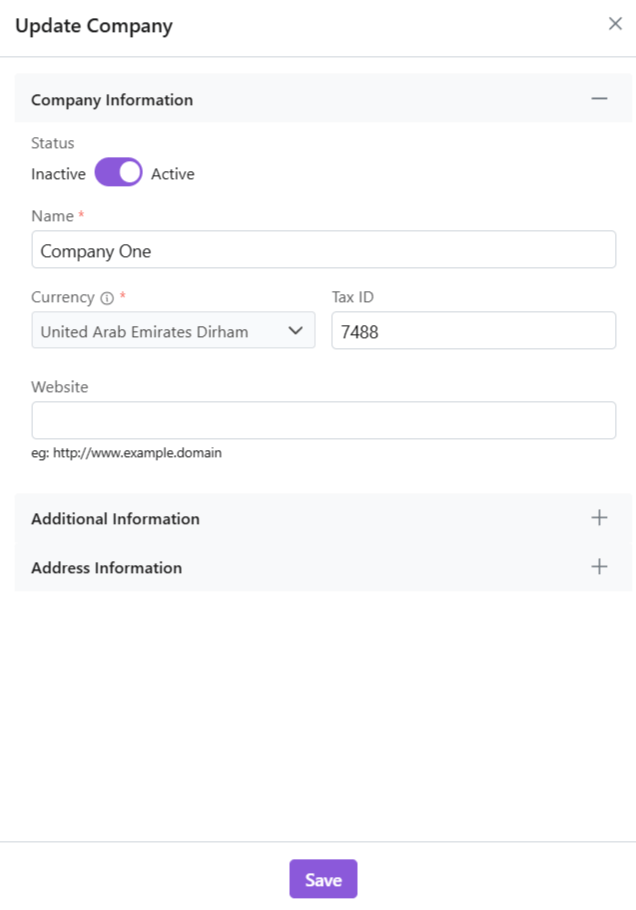
- Company: Select or add a company to whom this quote is being sent
- Contact: Add contact from that company
- Owner: Owner is the person who created the document or to whom it is assigned
- Quotation Date: Date on which quote was created.
- Payment Terms: Select or add payment terms
- Expiry Date: The date on which the quote will expire (client must respond before expiry date)
- Subject: Optional field
- Exchange Rate: Based on company selection, the exchange rate will be calculated automatically. You can also manually adjust the exchange rate at the document level itself.
- Quote Items: Add items to the quotation with a single click, selecting items from the product catalogue
- Modify quantity and unit price
- Zhylar supports the primary & secondary UOM concept. You can specify quantity in any of the primary or secondary UOM. The unit price can also be specified in any of the primary or secondary UOM.
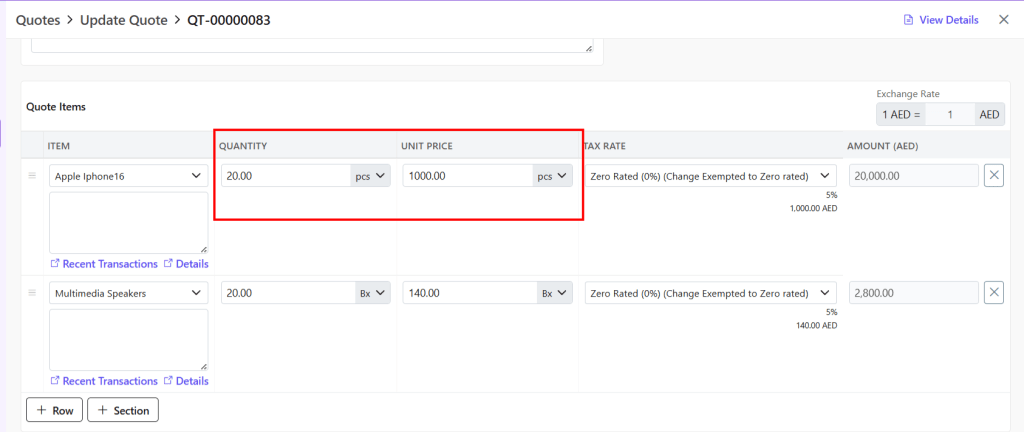
- Where Secondary UOM has been added, you can click on the downward facing arrow. Select which UOM you want to use for this Quote.

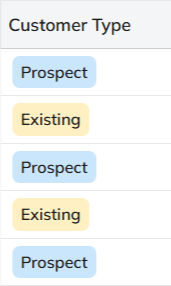
- Discount: This field is visible only if line discounts are enabled for your organization. You can specify the discount either as a percentage or as a fixed amount
- Tax Rate: The tax will be pre-loaded based on the item selected. It is defined during the creation of the item. However, you still have the option to change the tax that is applied to the item selected.
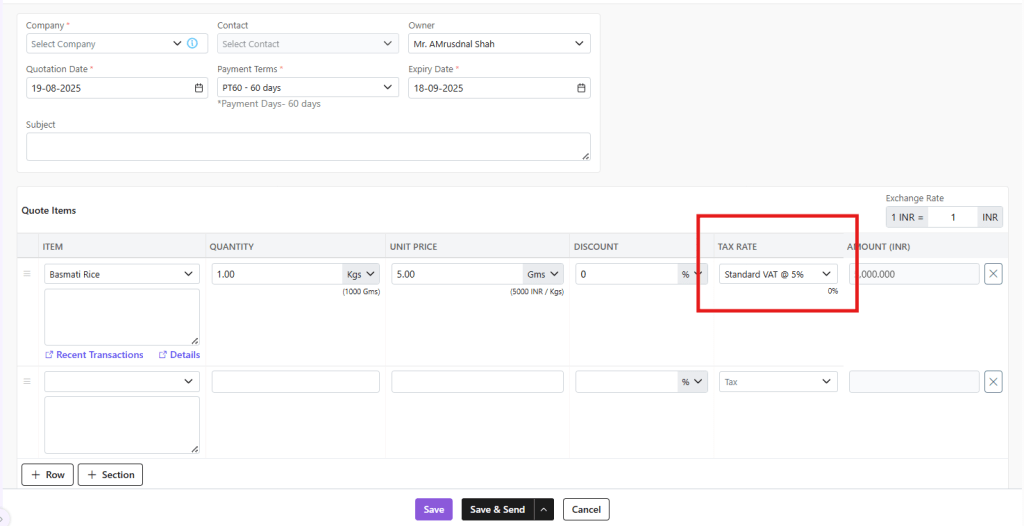

- Amount: Amount will be calculated based on Quantity * Unit Price – Discount
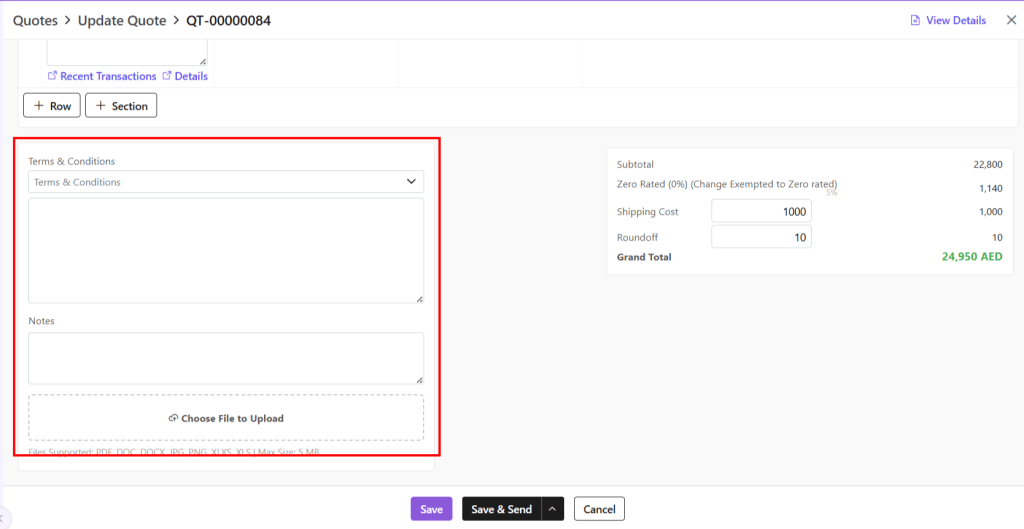
- Terms & Conditions: You can select T&C from the defined T&C templates. Alternatively, you can type them manually as per your need.
- Notes: Any notes about the document to displayed to customer.
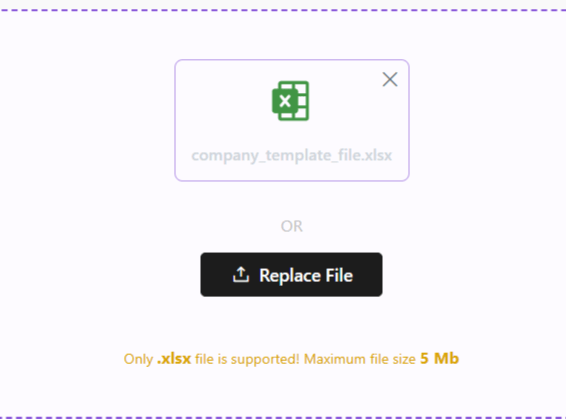
- File Upload: This is to upload related files along with documents.
- Save as Draft (edit later)
- Save & Send (send immediately)
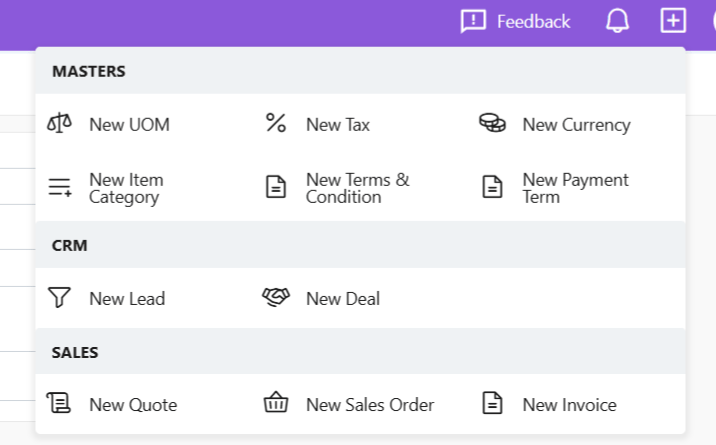
Shortcut (Header)
A new quote can also be added by clicking the + sign next to the profile. All following steps remain the same.
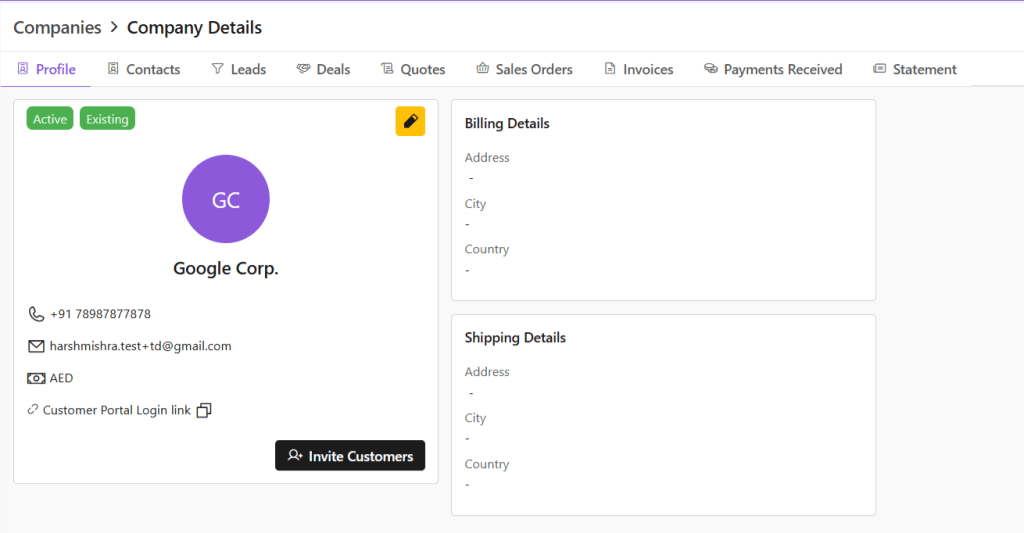
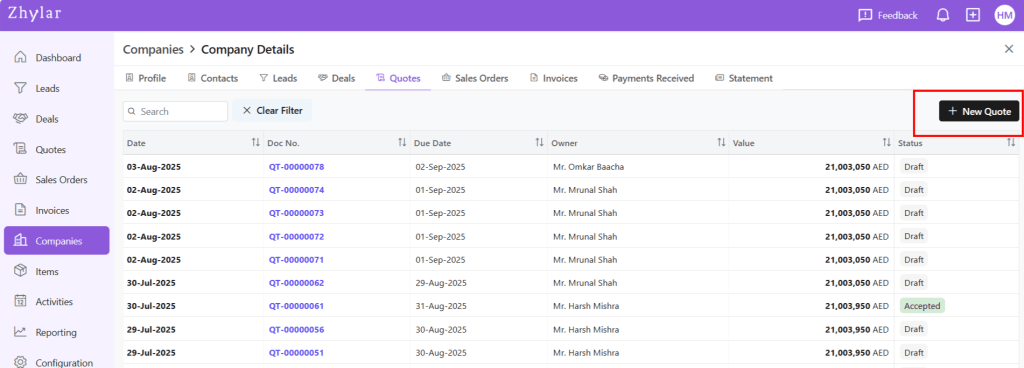
Companies Module
- From the Companies module, click open the company to whom you want to send a Quote.
- Go to Quotes tab.
- Select +New Quote
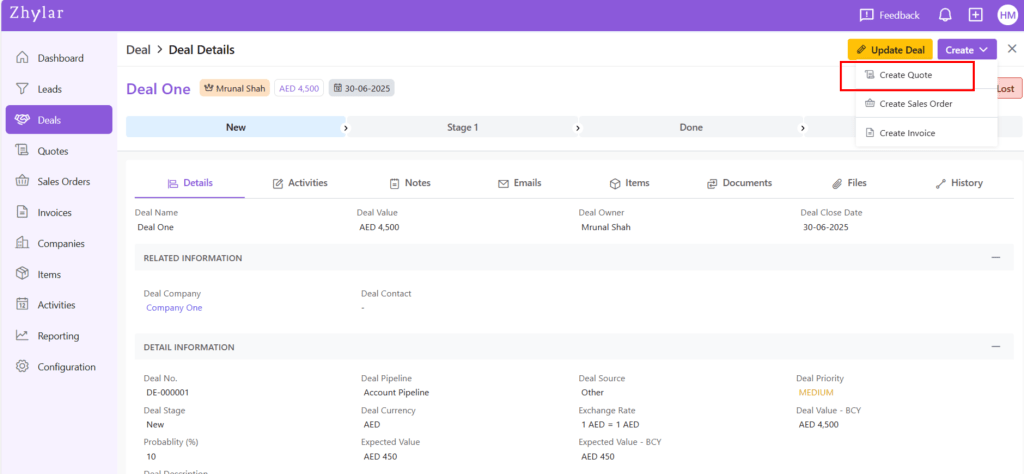
From Deal
A Quote can also be created from a Deal.
- Go to Deals module.
- Click open the Deal for which you want to make a Quote.
- Go to View Deal.
- Click Create.
- Select Create Quote.
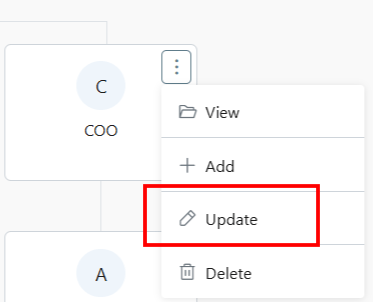
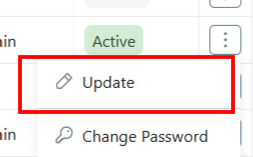
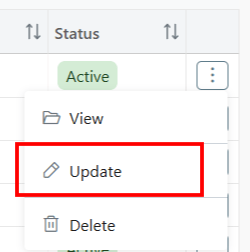
Update Quote
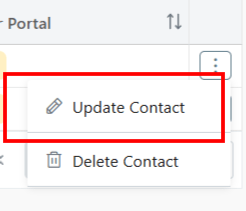
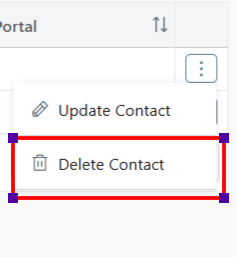
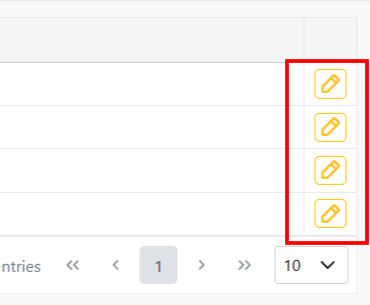
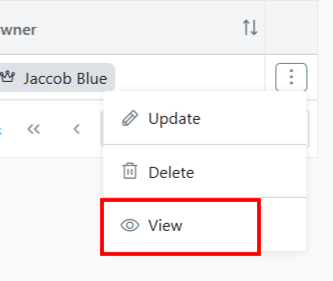
- Click on the ⋮ 3 dots
- Select Update (or View)
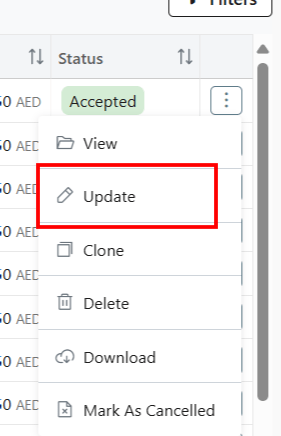
- Make changes
- Save (draft) or Save & Send
- A Quote can be updated at any stage except if it is marked as Rejected or Cancelled.
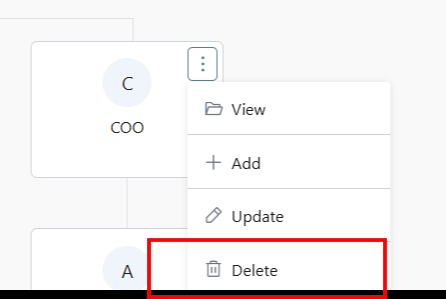
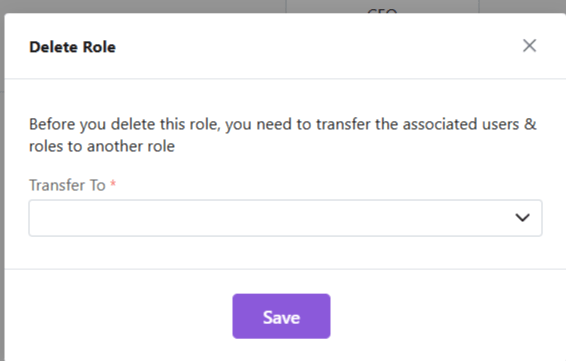
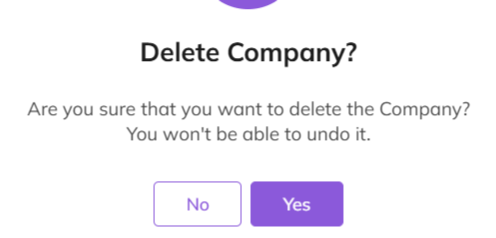
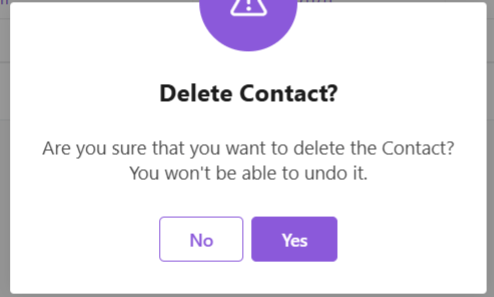
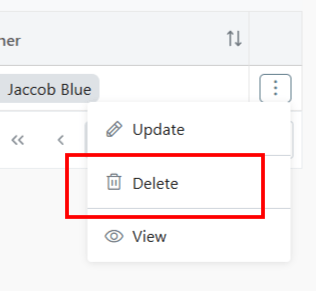
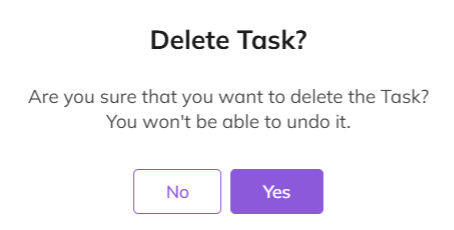
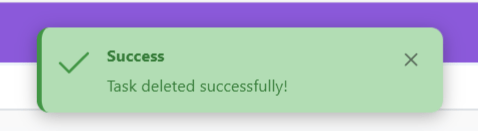
Delete Quote
- Meaning: Permanent removal, irreversible
- Steps:
- Click Delete (document can be deleted at any time)
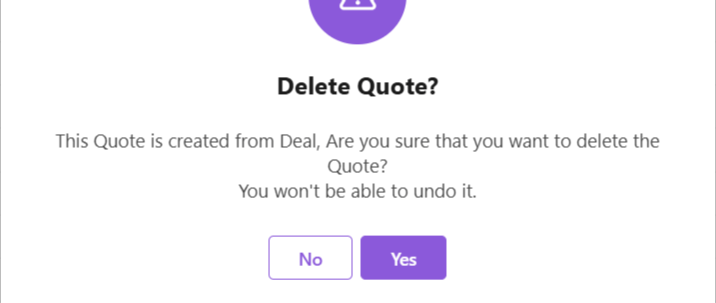
- Confirm deletion prompt.
- If Quote is linked with other modules, all interlinking will be deleted as well.
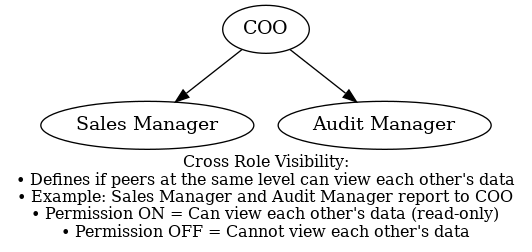
Quote Lifecycle (Stages & Actions)
Defines stages from creation to acceptance, rejection, invoicing, or deletion. Teams can thus streamline quotations and prevent manual errors.
Draft Stage (Unsent)

- Meaning: Prepared quote has not been sent
- Actions:
- View: Check quote details
- Update: Edit if needed
- Clone: Make a copy (can be edited)
- Download: Save as PDF to your device
- Mark as Sent: Send to customer
- Delete: Remove if not required
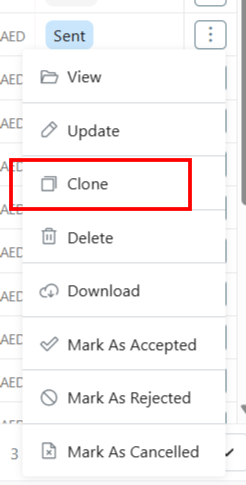
Sent (Awaiting Response)
- Meaning: Sent to customer, pending reply
- Actions:
- View/Update/Clone/Download/Delete
- Mark as Accepted: Customer has agreed
- Mark as Rejected: Customer has declined
- Mark as Cancelled: Offer withdrawn internally
Accepted (Customer Approved)
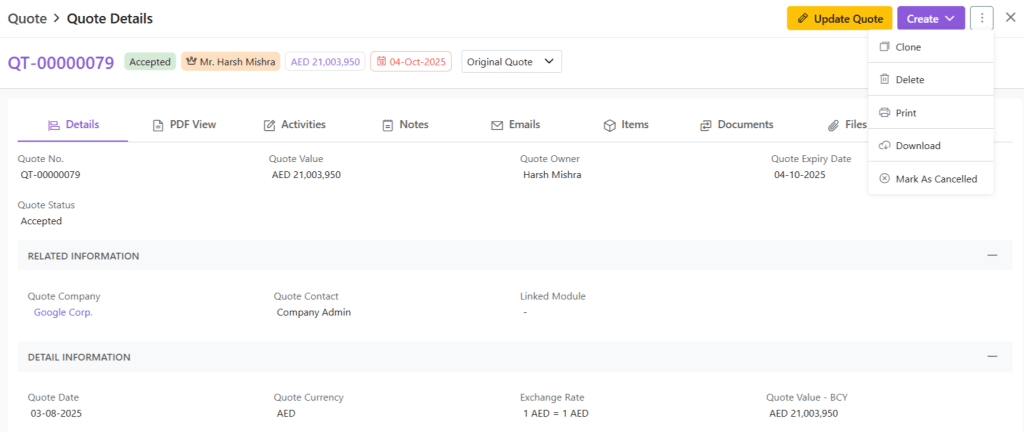
- Meaning: Quote approved by customer
- Actions:
- View/Update/Clone/Download/Delete
- Convert SO: Create sales order
- Convert to Invoice: Bill directly > No SO created
- Mark as Cancelled: Revoke post-approval
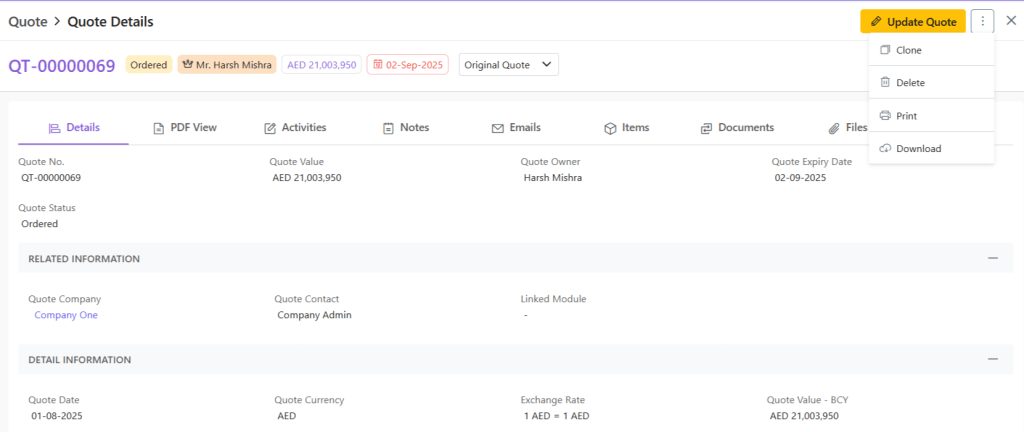
Ordered (Sales Order Created)
- Meaning: Quote → Sales Order
- Actions: View/Update/Clone/Delete/Download
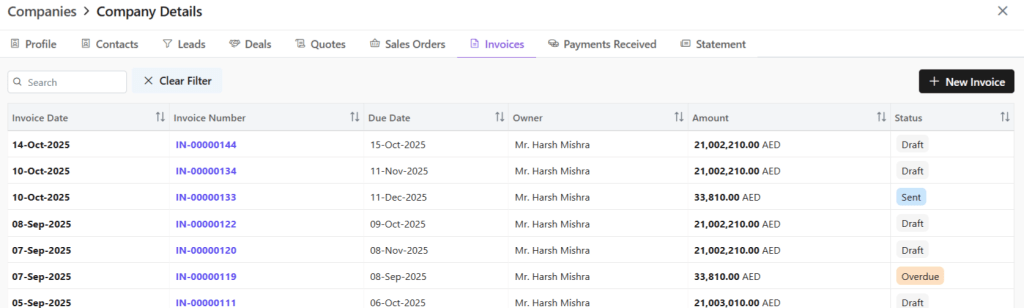
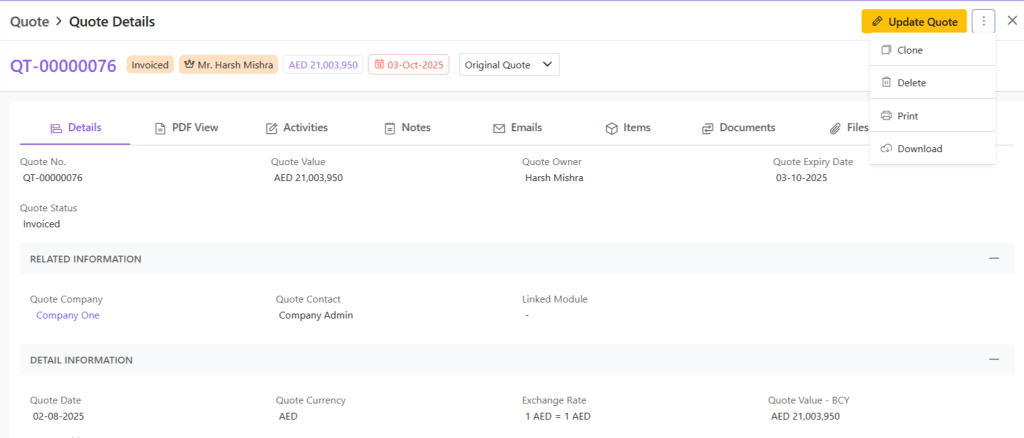
Invoiced (Billed to Customer)
- Meaning: Quote → Invoice directly
- Actions: View/Update/Clone/Delete/Download
Rejected (Customer Declined)

- Meaning: Quote refused, status cannot be changed
- Actions: View/Update/Clone/Download/Delete
Cancelled (Withdrawn by Seller)
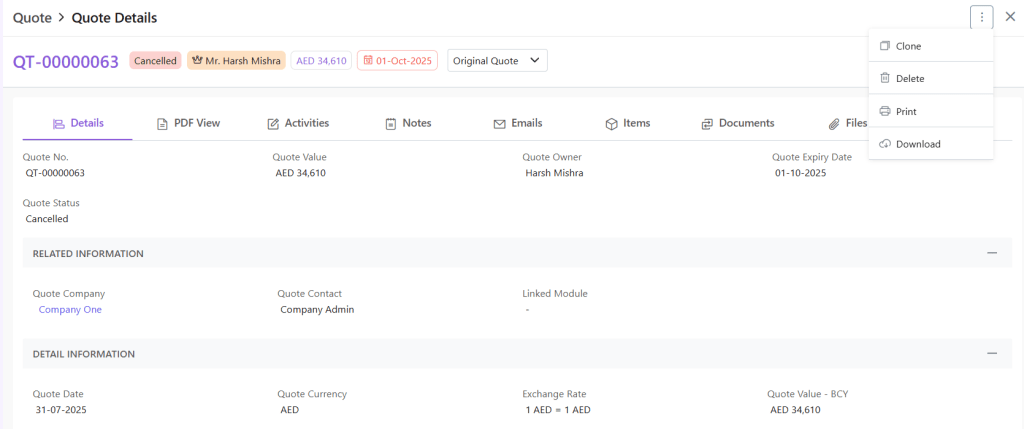
- Meaning: Offer revoked internally, status cannot be changed
- Actions: View/Update/Clone/Download/Delete
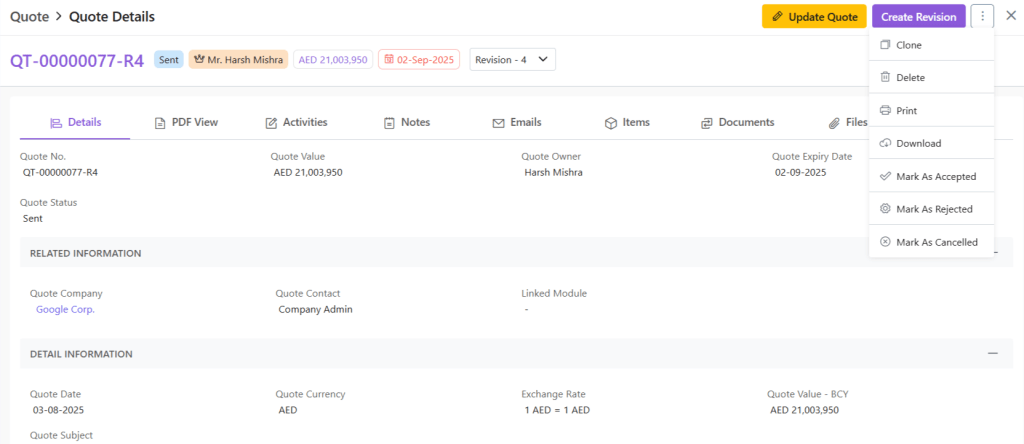
Quote Revision
On the Zhylar platform, you can make Quote Revisions. Read about how to make and maintain Quote Revisions in detail.
Clone a Quote
- Click ⋮ 3 dots > Clone
- Copy created instantly. You can edit it before saving/sending.
- Clone can be edited and/or sent out immediately.
- A clone can be created at any stage.
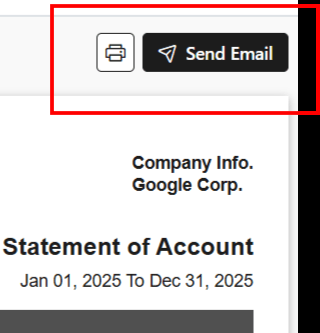
Print/Download Quote
- Click on ⋮ 3 dots > Print/Download
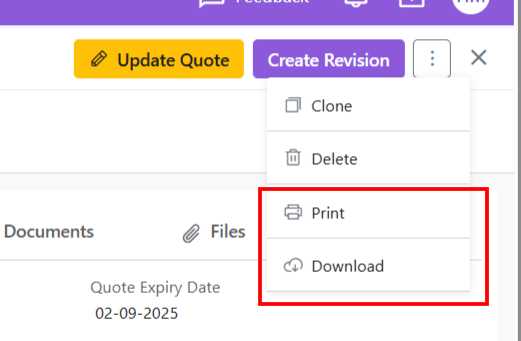
- Document saved to device in PDF format
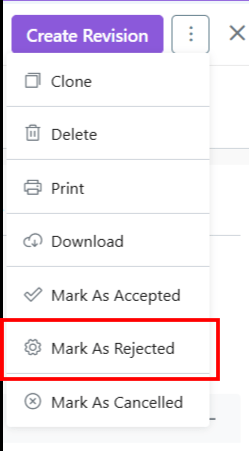
Mark as Rejected/Final
- Click ⋮ 3 dots > Mark as Rejected/Final
- Final quotes → SO/Invoice
- Rejected status is permanent
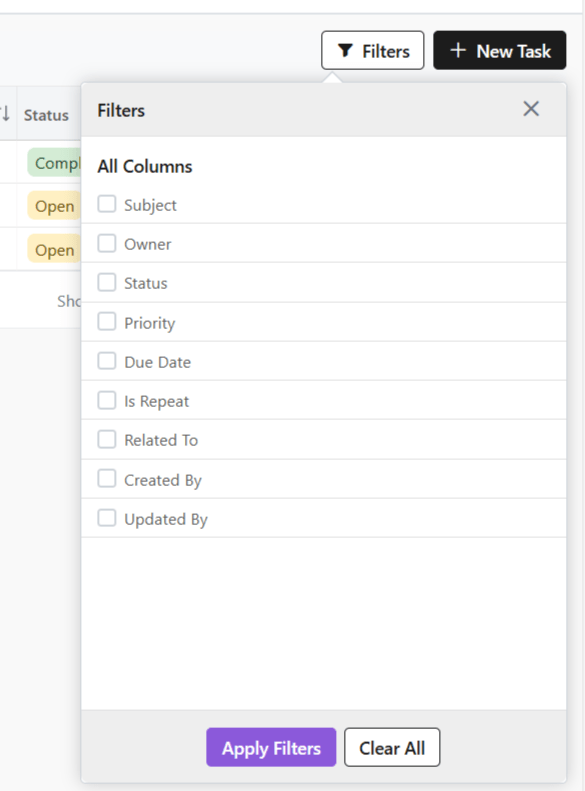
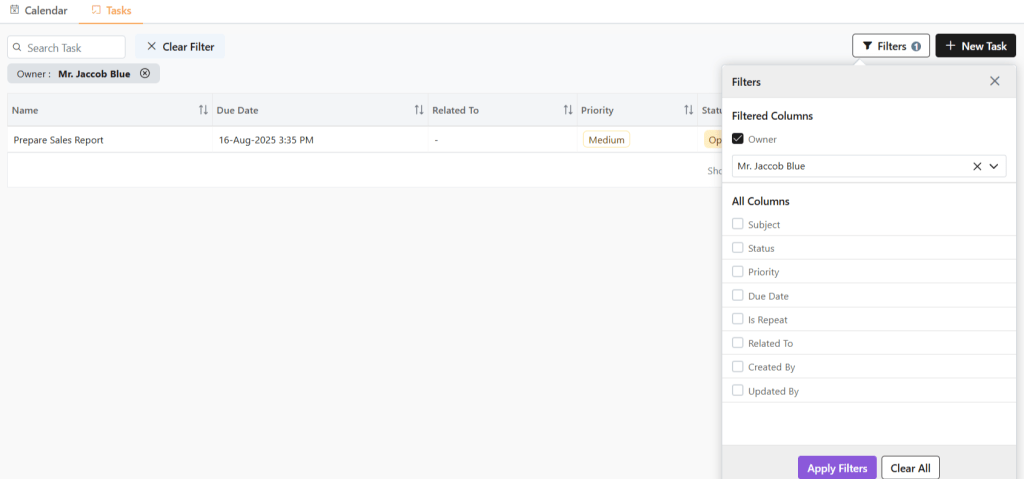
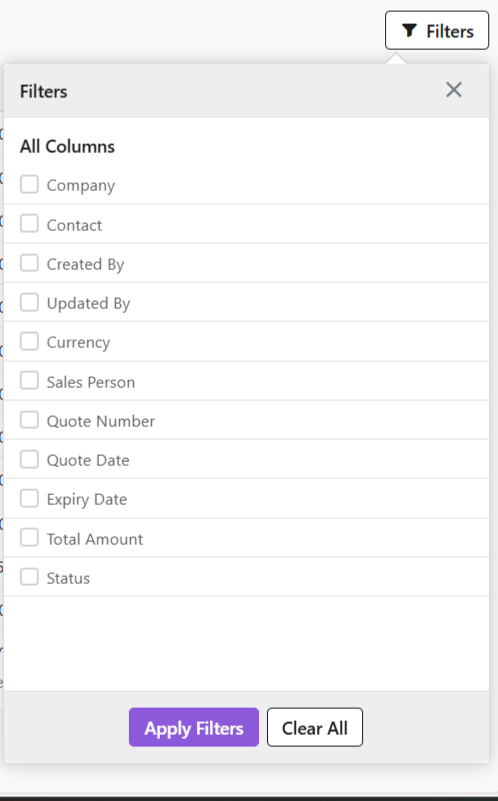
Sorting and Filter
- Universal Search
- Use search bar for quick searches
- Finds matches across all fields
- Sorting
- Click column headers to sort by:
- Date
- Doc No
- Company
- Expiry Date
- Sales Person
- Amount
- Status
- Click column headers to sort by:
Filter
For a more detailed search, use the Filter button to get precise results.
Quote Templates
- Quote templates are pre-designed formats. They auto-fill customer and other details. This enables fast, error-free quote generation. These templates save time and accelerate sales. (template document to be linked)
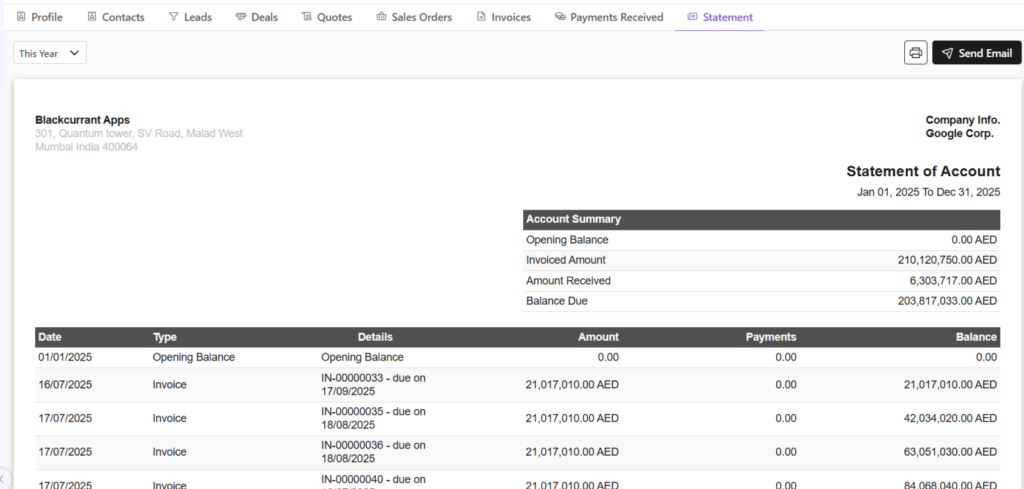
Quote Details
When you click open any quote, you will be provided with a wholistic inside-out-view of the quote in your system. This includes:
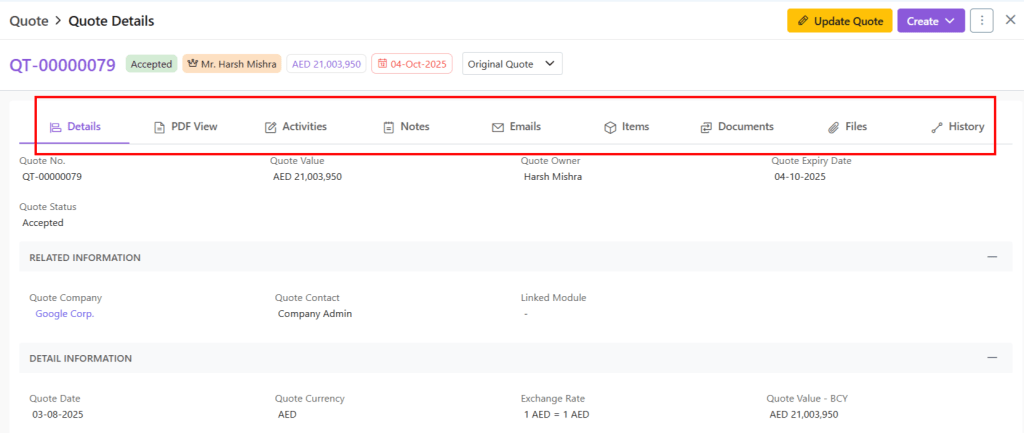
- PDF view– Final quote layout
- Activities: Add/Track activities like calls and meetings for this transaction
- Notes– Make/Update notes
- Emails– Show email history in reference to this quote.
- Items– All items added to this quote.
- Documents– SO/Invoice created from this quote
- Files- Check files attached to this quote.
- Quote Timeline– Track creation/update history
Please note
- Quote can be deleted at any stage.
- Deleted quotes cannot be restored
- Cancelled ≠ Rejected (internal vs. customer action)
Discover how Zhylar can streamline your sales and elevate your business processes. Visit our website or book a demo today to experience the difference!