Let’s understand how to connect Google Lead Forms with Zhyalr CRM, configure webhooks, and verify data flow.
Getting Started- Connect Google to Zhylar CRM
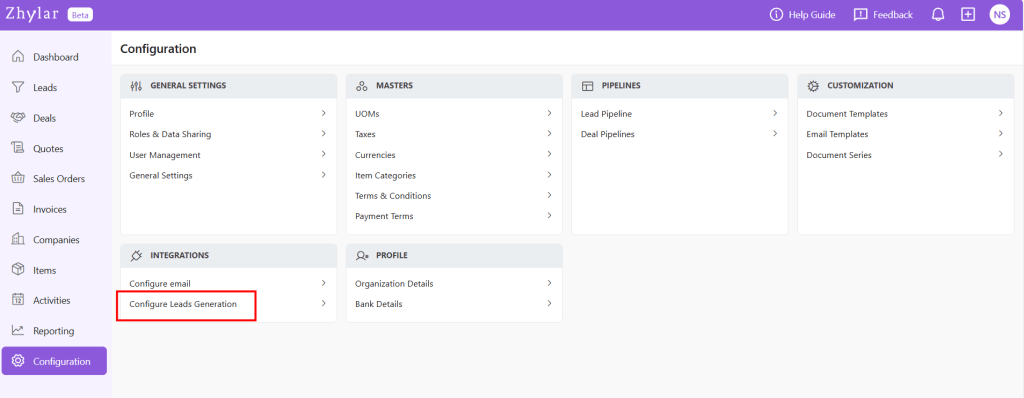
Log in to Zhylar CRM.
Go to Configuration.
Navigate to Lead generation.
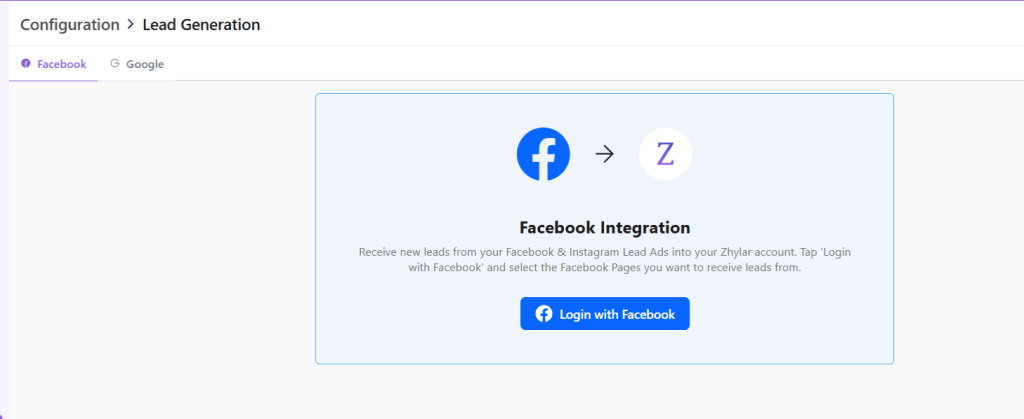
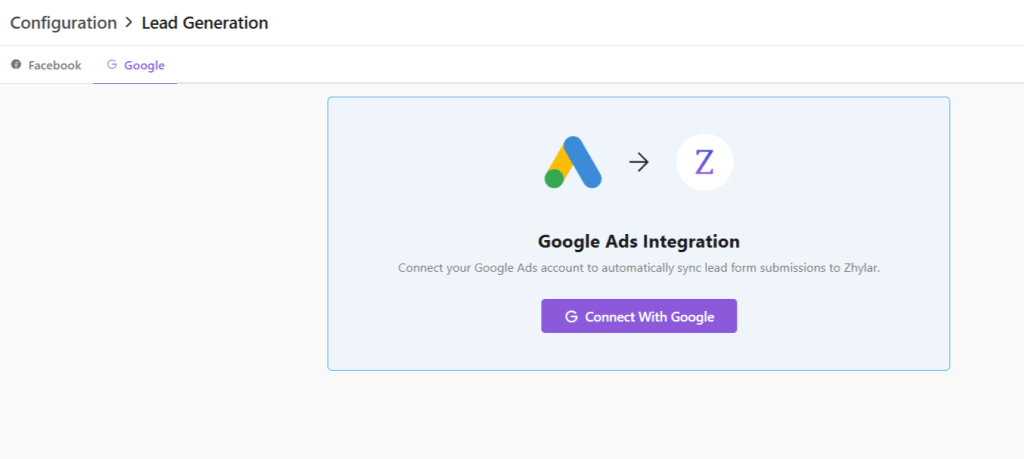
Select Google/Facebook and click Connect.
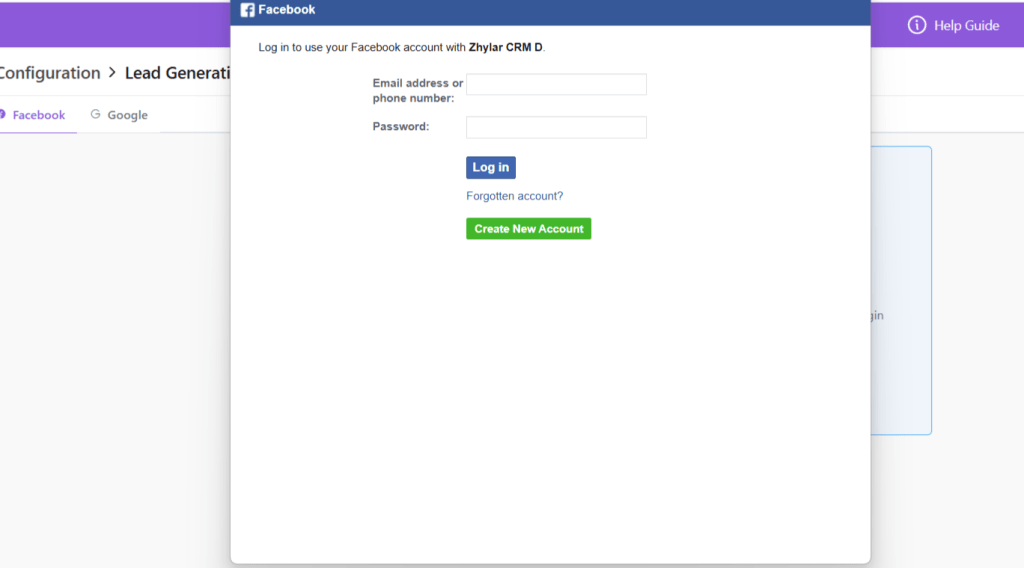
Choose the Google/Facebook account you want to link.
Click Continue through the consent screens.
What access does Zhylar have to this data?
Zhylar.com has the following access to your Google ads account:
See, edit, create and delete your Google Ads accounts and data
This app wants permission to do anything that you can do on your Google Ads account, including:
See your performance data
Create, edit or delete your campaigns, ad groups and ads
Create, edit or delete your bidding targeting and scheduling settings
Set and change your budgets
See, apply and dismiss your recommendations
Edit your billing settings
There may be sensitive information in your accounts, such as financial
information or performance metrics.
If your Google Account’s access is limited to read-only access, email-only access or any other restriction, then this app’s access will be limited in the same way. For example, if you only have read-only access to the account, then this app will be able to pull reports but not make changes to the account.
Over time, the app’s ability to access this account will follow that of your Google
Account. So if your access to the account is revoked, then this app won’t be able
to access it either.
See your personal info, including any personal info you’ve made publicly available
–
This app wants permission to:
See your full name
See your profile picture
See your gender
See your preferred languages
See any other information that you’ve made publicly available
See your primary Google Account email address
This app wants permission to:
See the primary email address associated with your Google Account
Associate you with your personal info on Google
This app wants permission to:
Know who you are on Google and associate you with the personal info you have
made public “
Generate webhook details
After successful connection, copy the Webhook URL shown on the Zhylar screen.
Paste this webhook URL into your Google Ads Lead Form settings.
Copy the API key / secret key provided by Zhylar.
Send test data from Google
In Google Ads, use the Send test data option for the connected lead form.
Submit a test lead to trigger the webhook.
Step 4: Verify data in Zhylar CRM
Return to your Zhylar screen.
Open the Leads section.
Confirm that the test lead has been received.
Verify that all relevant fields (name, email, phone, campaign details, etc.) are populated correctly.
For a demo of the entire process, please watch the video below:
https://youtu.be/LLykGXa07tA?si=3qZp6zf_UiEIIfgY
Discover how Zhylar can streamline your sales and elevate your business processes. Visit our website or book a demo today to experience the difference!