What is Email Configuration in a CRM system?
Email configuration refers to the setup process that connects your business email account (IMAP or Outlook) with the CRM. This enables users to send, receive, track, and manage emails directly within the CRM. It ensures centralized communication, improves customer engagement, and supports features like templates, automation, and activity logging.
Configure Email
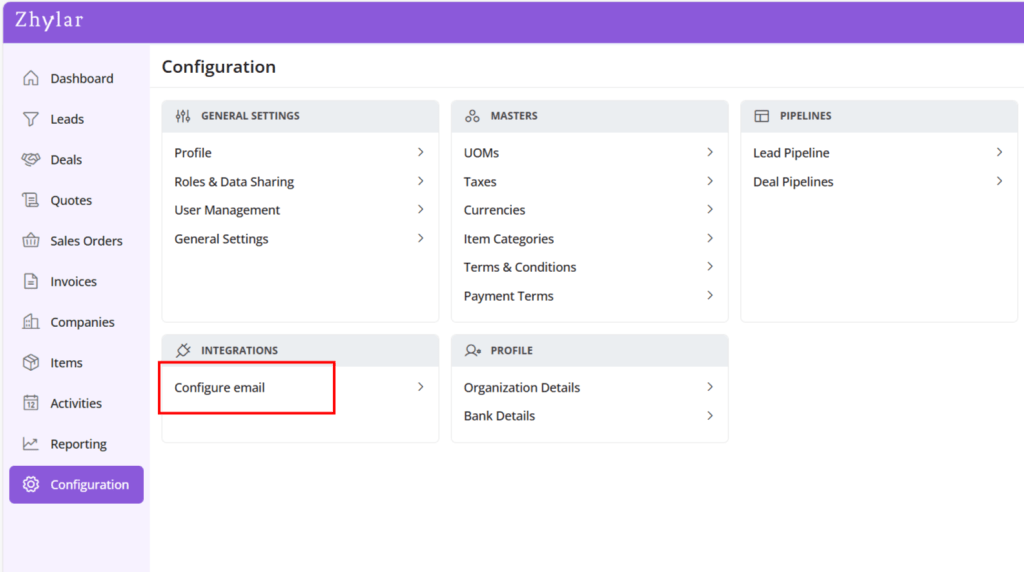
- Log in to Zhylar
- Go to Left-hand navigation panel
- Click on Configuration
- Under Integrations tab, select Configure Email
- A new page will open.
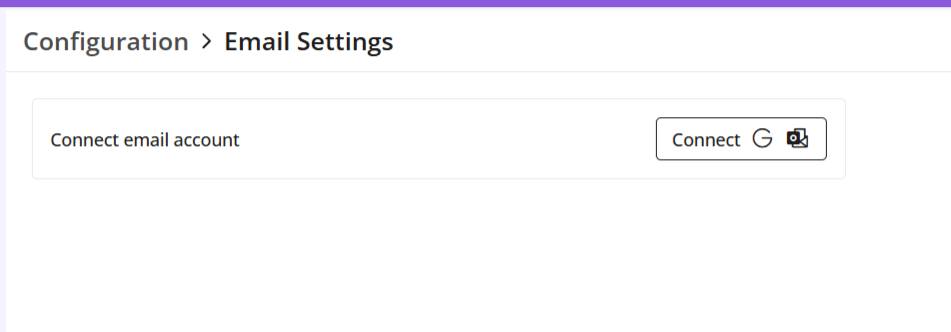
- Click on “Connect email account” to proceed.
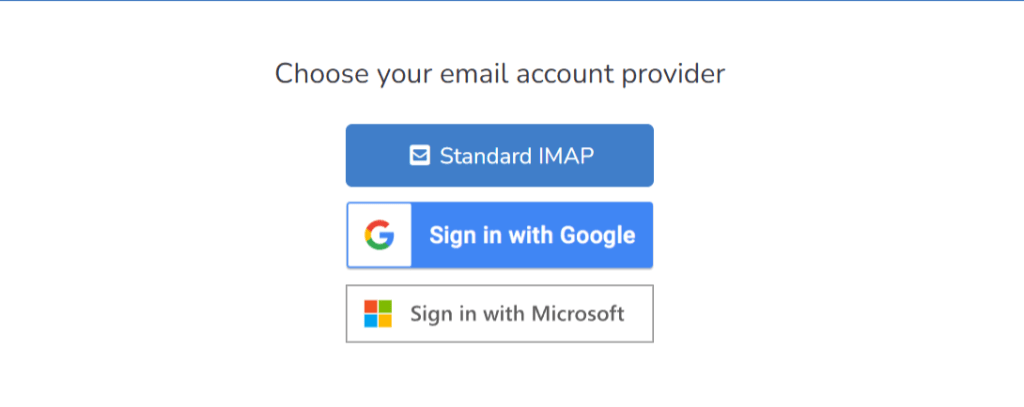
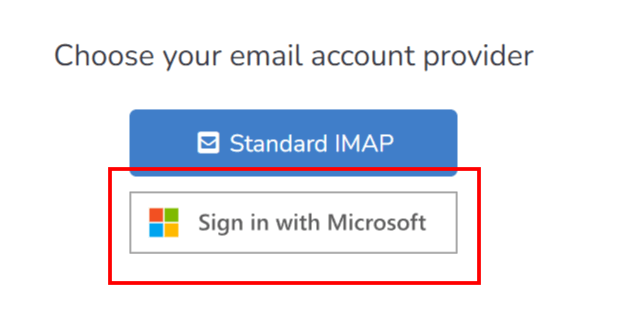
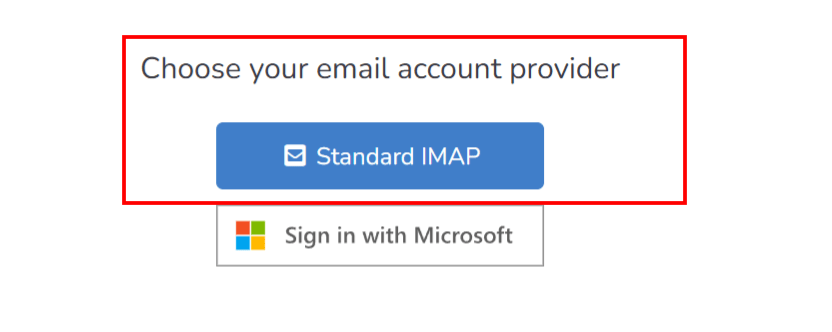
- Select one of the following email providers to continue.
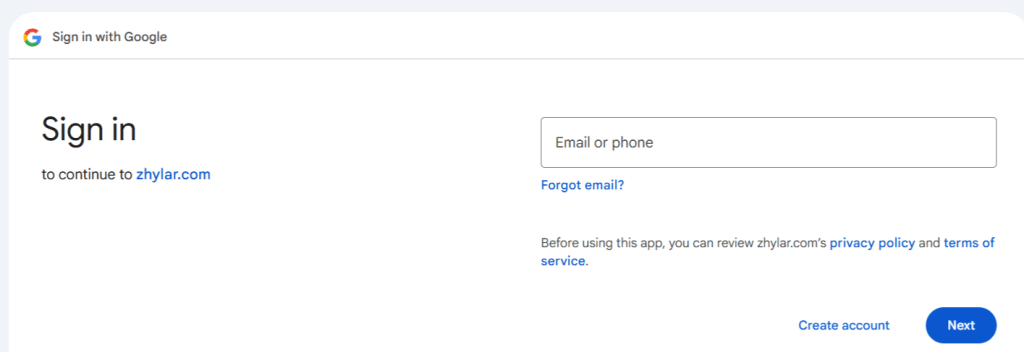
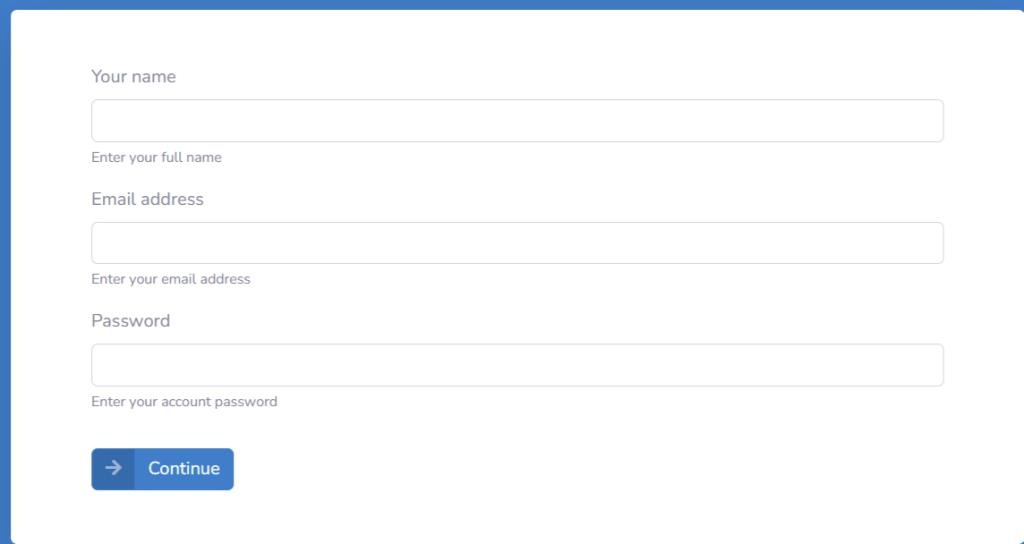
- You will be taken to a sign-in page. Fill in your email ID that you want to configure.
- Select an existing account or add new account.
For Outlook / Microsoft 365
- Click Connect with Outlook.
- A Microsoft sign-in prompt appears.
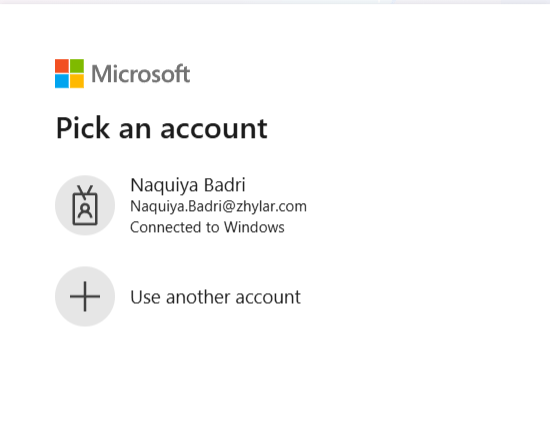
- Authenticate with your Microsoft credentials.
- Your email has been configured.
Note: One user can configure one email ID only.
Custom IMAP/SMTP setup
Use this option when connecting a non-OAuth email provider (for example, a company-managed mail server).
Step-by-step instructions
- Open the email integration settings in Zhylar.
- Select Custom IMAP/SMTP as the connection method.
- Enter the required email server details:
- Email address: Enter your full company email address.
- IMAP host / port: Enter the IMAP server address (e.g.,
imap.example.com) - SMTP host / port: Enter the SMTP server address (e.g.,
smtp.example.com)
- Username and password: Enter your company email login credentials.
- Review the entered server details for accuracy.
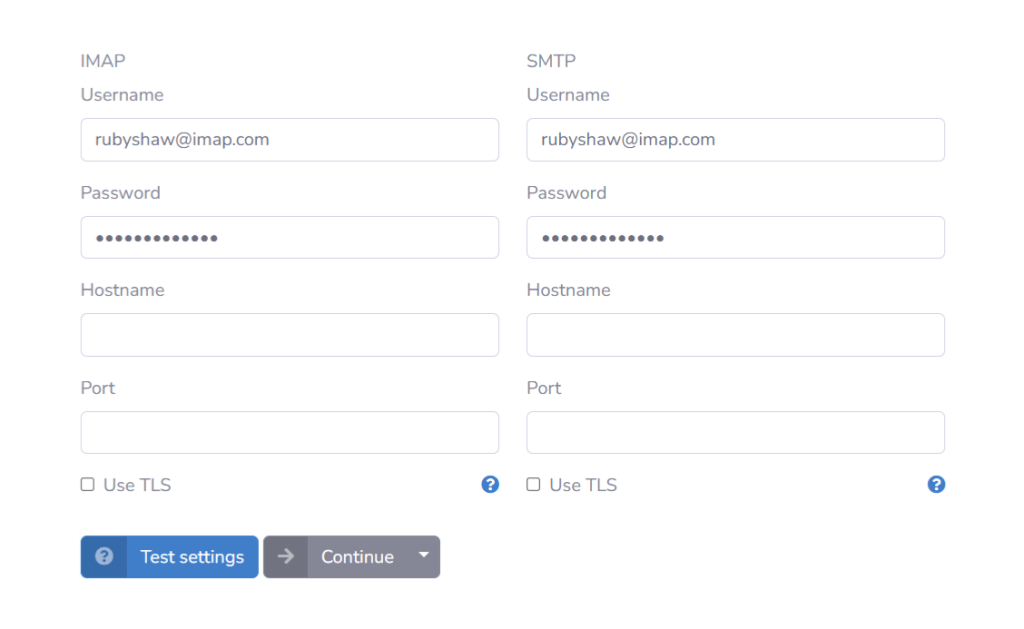
- Click Save to submit the configuration.
- Once the user completes authentication or enters credentials, Zhylar sends the details to Email Engine for validation.
- Email Engine will attempt to authenticate and establish IMAP/SMTP or API session.
- A success or error toast message will be displayed.
- Once a Success message is received that means you are connected. If an error message is received then user will have to check the details provided above or contact zhylar support team for the same.
Configure sending and receiving preferences
After the email account is connected, configure how emails are sent and received within Zhylar.
Sending preferences
- Select the default From address (typically the user’s primary email).
- Optionally configure an email signature that Zhylar will automatically append to all outgoing messages.
Receiving preferences
- Select the email folder to monitor (Inbox is selected by default).
- Enable auto-fetch or webhook notifications for incoming emails.
Enable email workflows
Once the email connection is active:
- Inbound emails received via EmailEngine APIs or webhooks flow directly into the Zhylar inbox or configured ticketing workflows.
- Outbound emails are sent using EmailEngine’s Submit API, with the process fully managed and abstracted by Zhylar.
This ensures seamless email communication and automation across your CRM workflows.
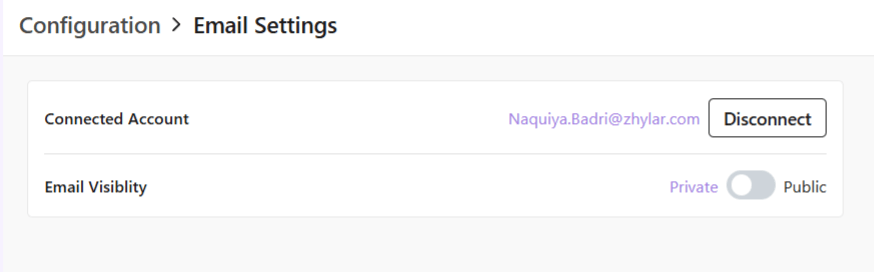
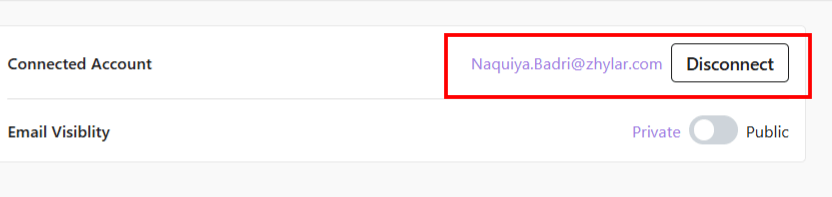
Disconnect Email
To disconnect your email ID,
- Click on Disconnect
- Provide confirmation.
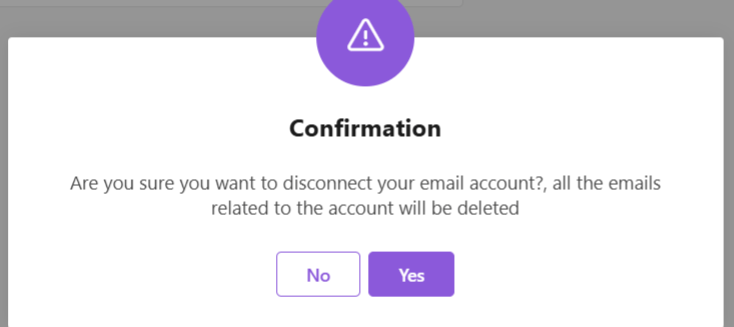
- Your email account will be disconnect.
Discover how Zhylar can streamline your sales and elevate your business processes. Visit our website or book a demo today to experience the difference!

Leave a comment